 LinITX Blog Ubiquiti & MikroTik Wireless Networking Experts

Do you have WiFi dead spots in your home or business?
Are you looking for alternative options to hardwiring an additional access point?
 If you have one already, you can connect your Mikrotik router wirelessly to an upstream router, this enables users to eliminate WiFi dead spots with the Mikrotik repeater setting.
You can also use this method to connect to another Mikrotik router or a third party router.
AIM: Connect a Mikrotik Router/access point wirelessly using 2.4Ghz or 5Ghz to another upstream router.
The connection will use station bridge/station pseudobridge.
At the end of this tutorial you will be able to use your Mikrotik router as a WiFi repeater and connect directly into the Mikrotik using a patch cable.
*Please note that your upstream router will need to be configured correctly and have internet access.
*Note, this guide applies to any MikroTik device that does not have the WiFi Wave 2 package installed from factory.
e.g. MikroTik hAP ac3, MikroTik hAP ac2, MikroTik hAP ac lite
Setup Steps to Use Repeater Mode on Your MikroTik Router
1. Reset the unit to start without a default configuration.
Your new login credentials will be:
Username: admin
Password: Leave this field empty
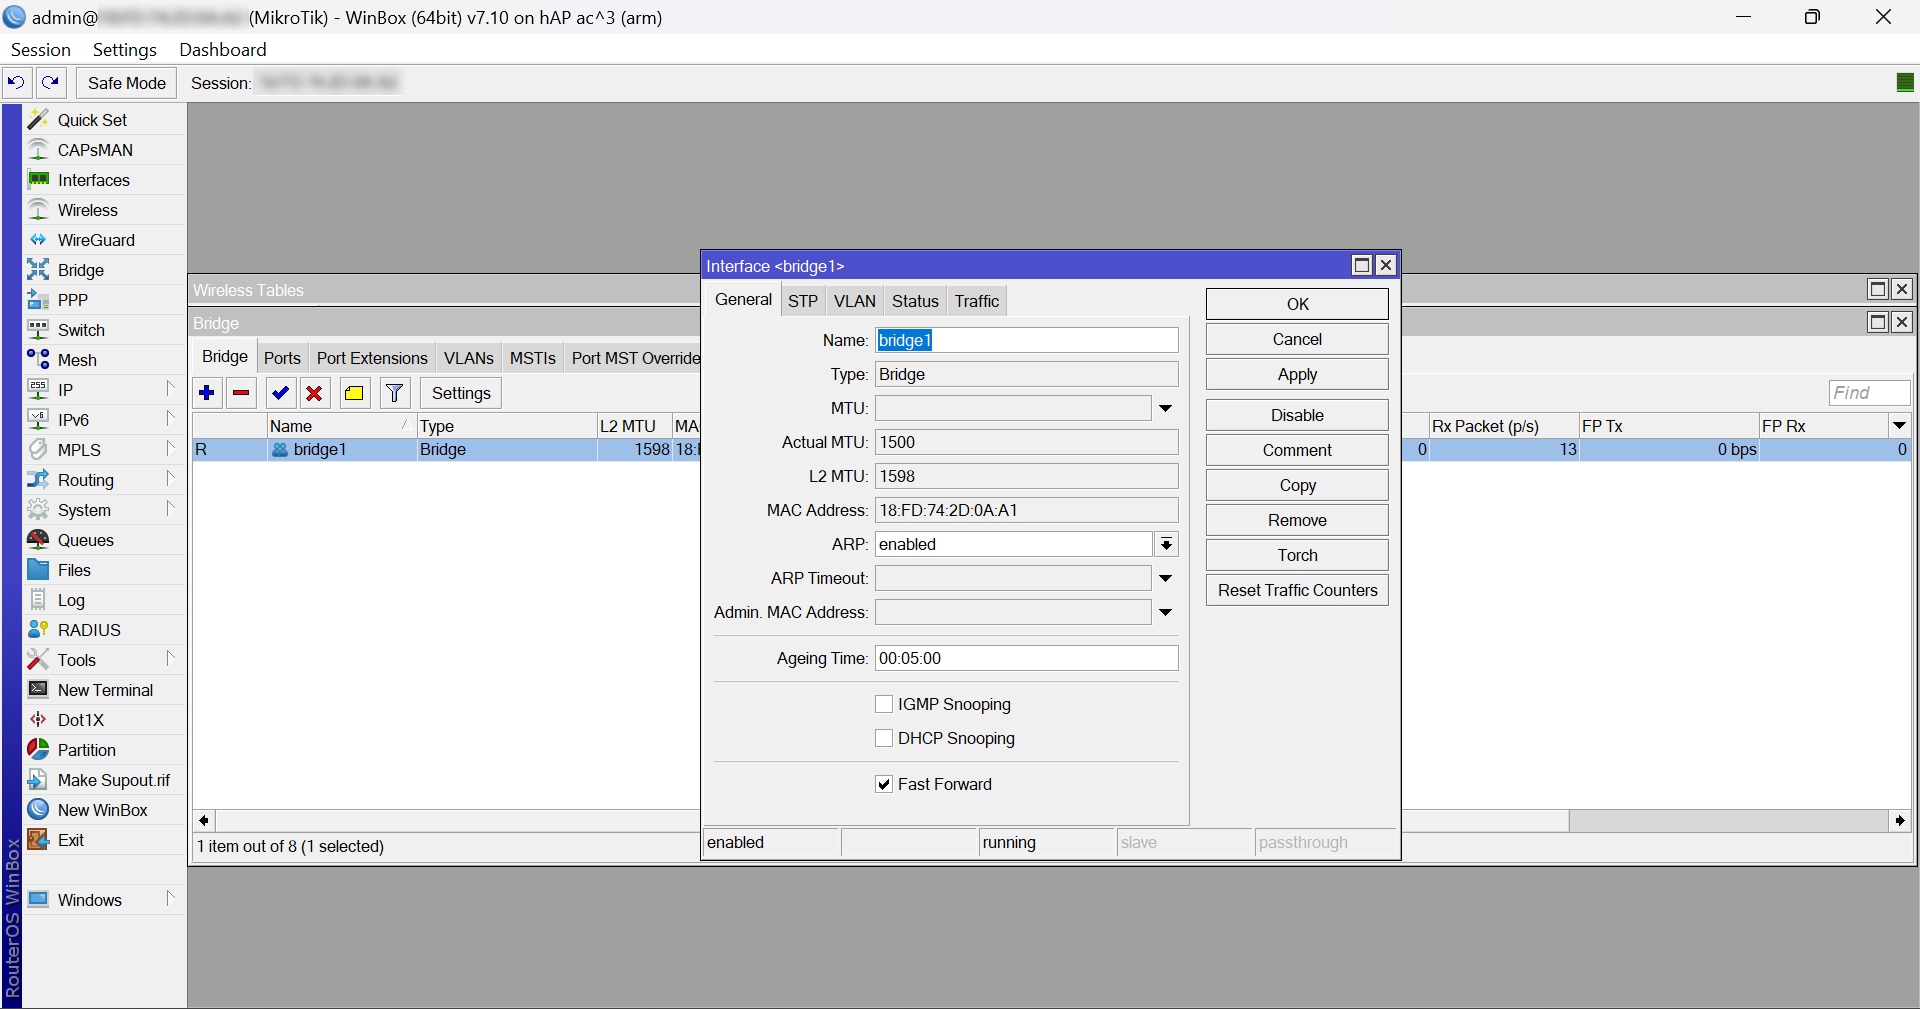
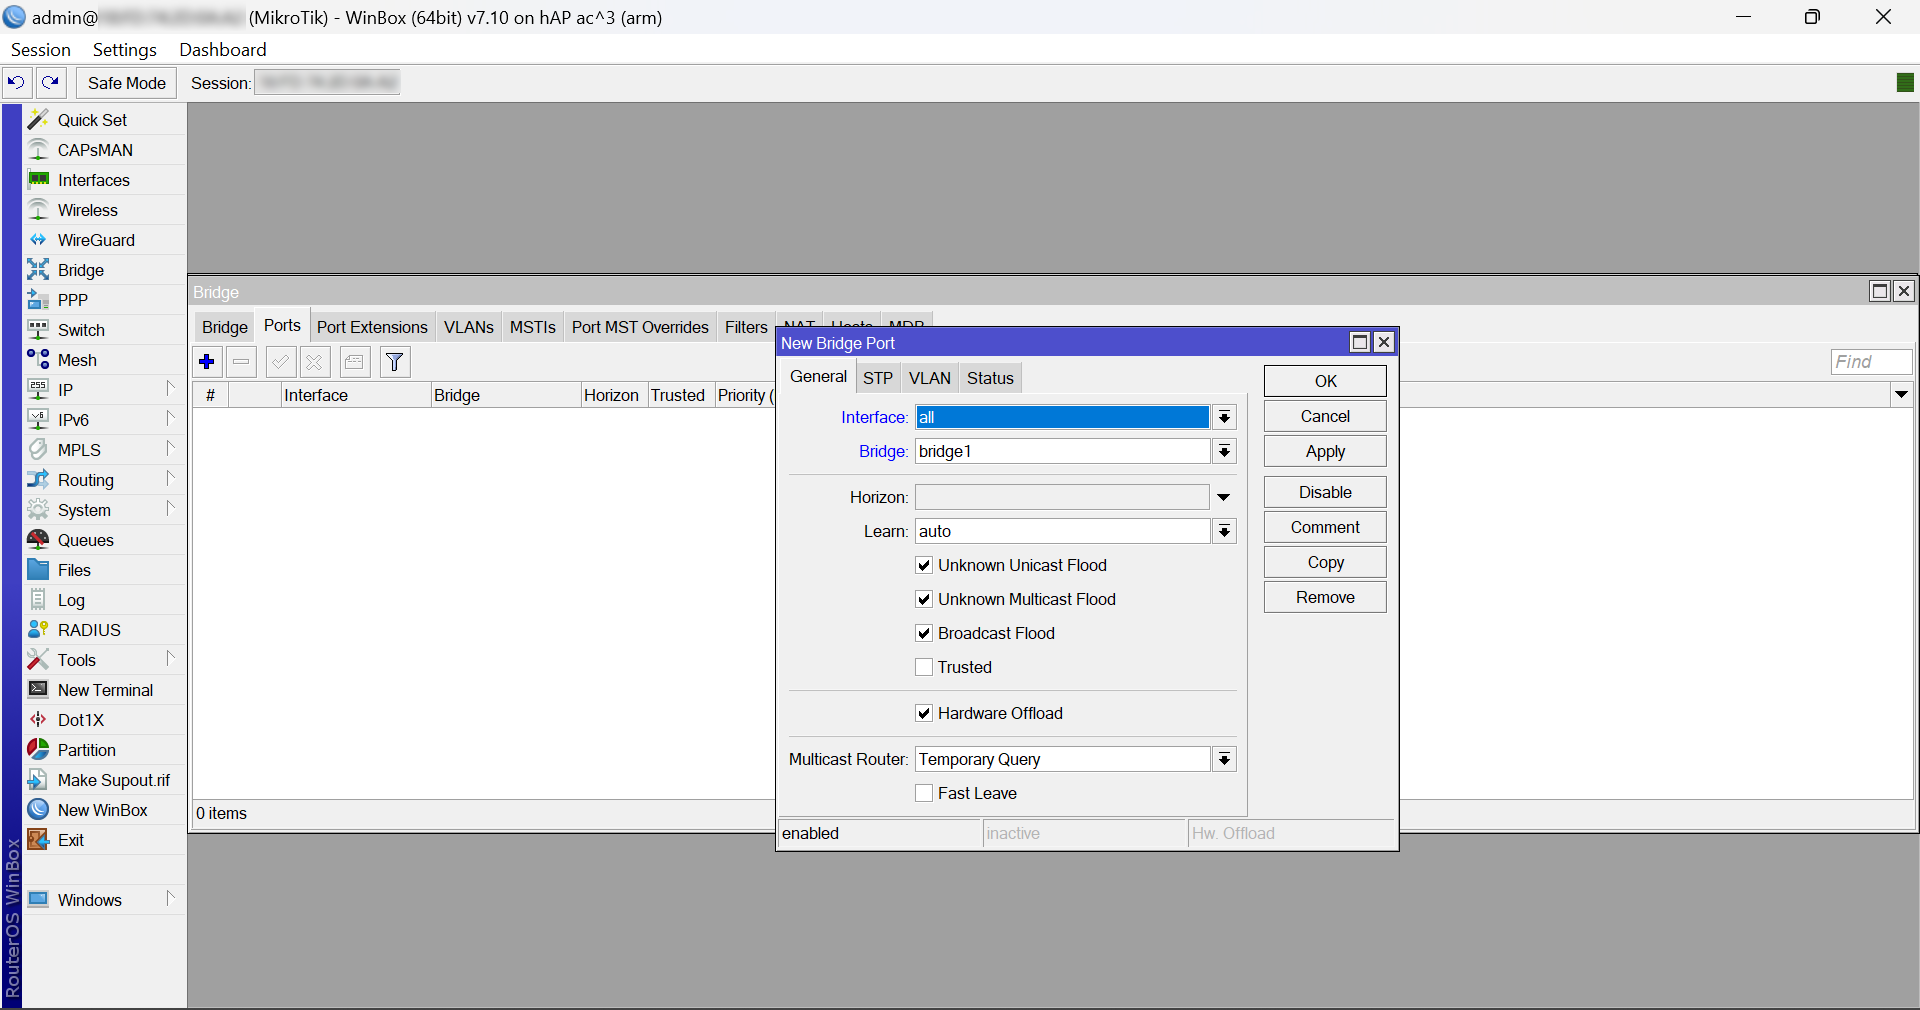
2. Create a bridge interface an add all ports into it. Bridge> + Bridge and provide a name > +Ports > Add all ports to the bridge you created.
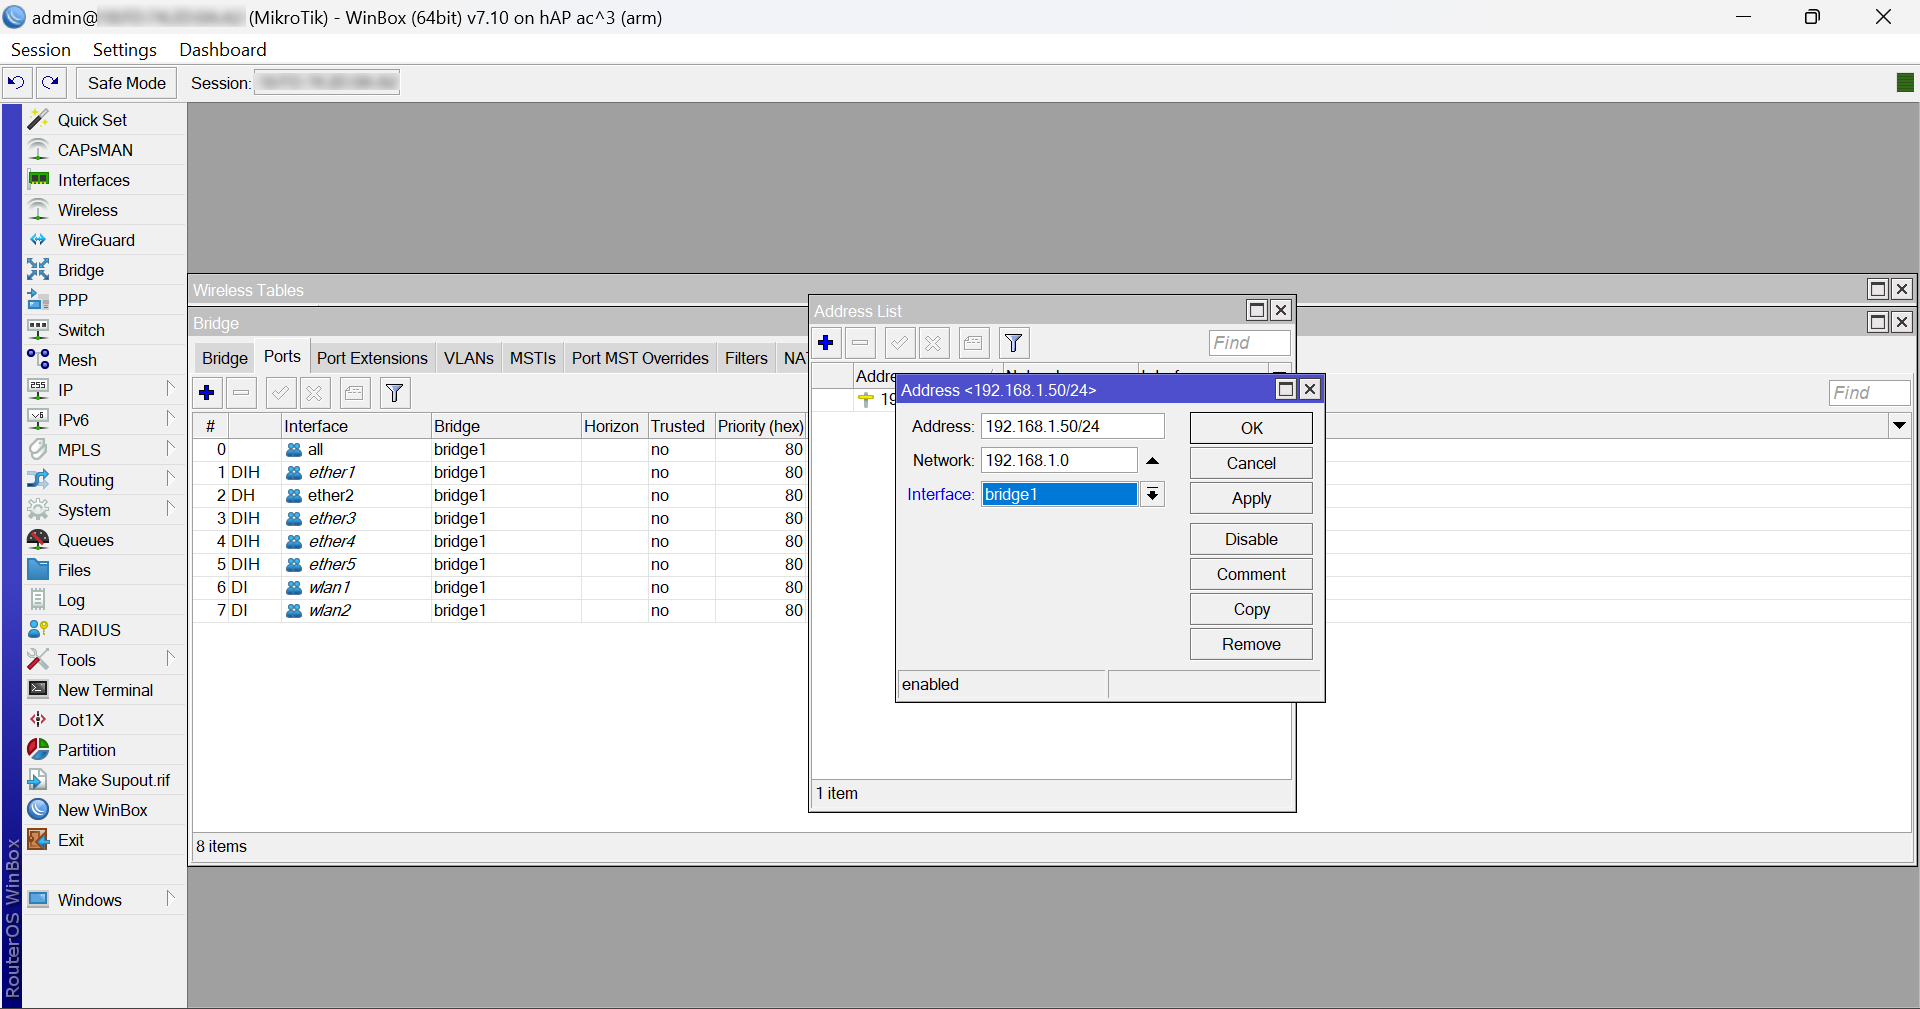
3. Assign an IP to the bridge interface. Navigate to IP>Addresses> + Address> Assign a private IP to your Mikrotik. It’s advised to put the IP within the same network range as the upstream router.
An example would be 192.168.1.50/24.
4. (Quick method):
Please consider both scenarios for step 4:
a) You want to connect your Mikrotik to a 3rd party router: Use station Pseudobridge
b) You want to connect your Mikrotik to another Mikrotik: Use station bridge
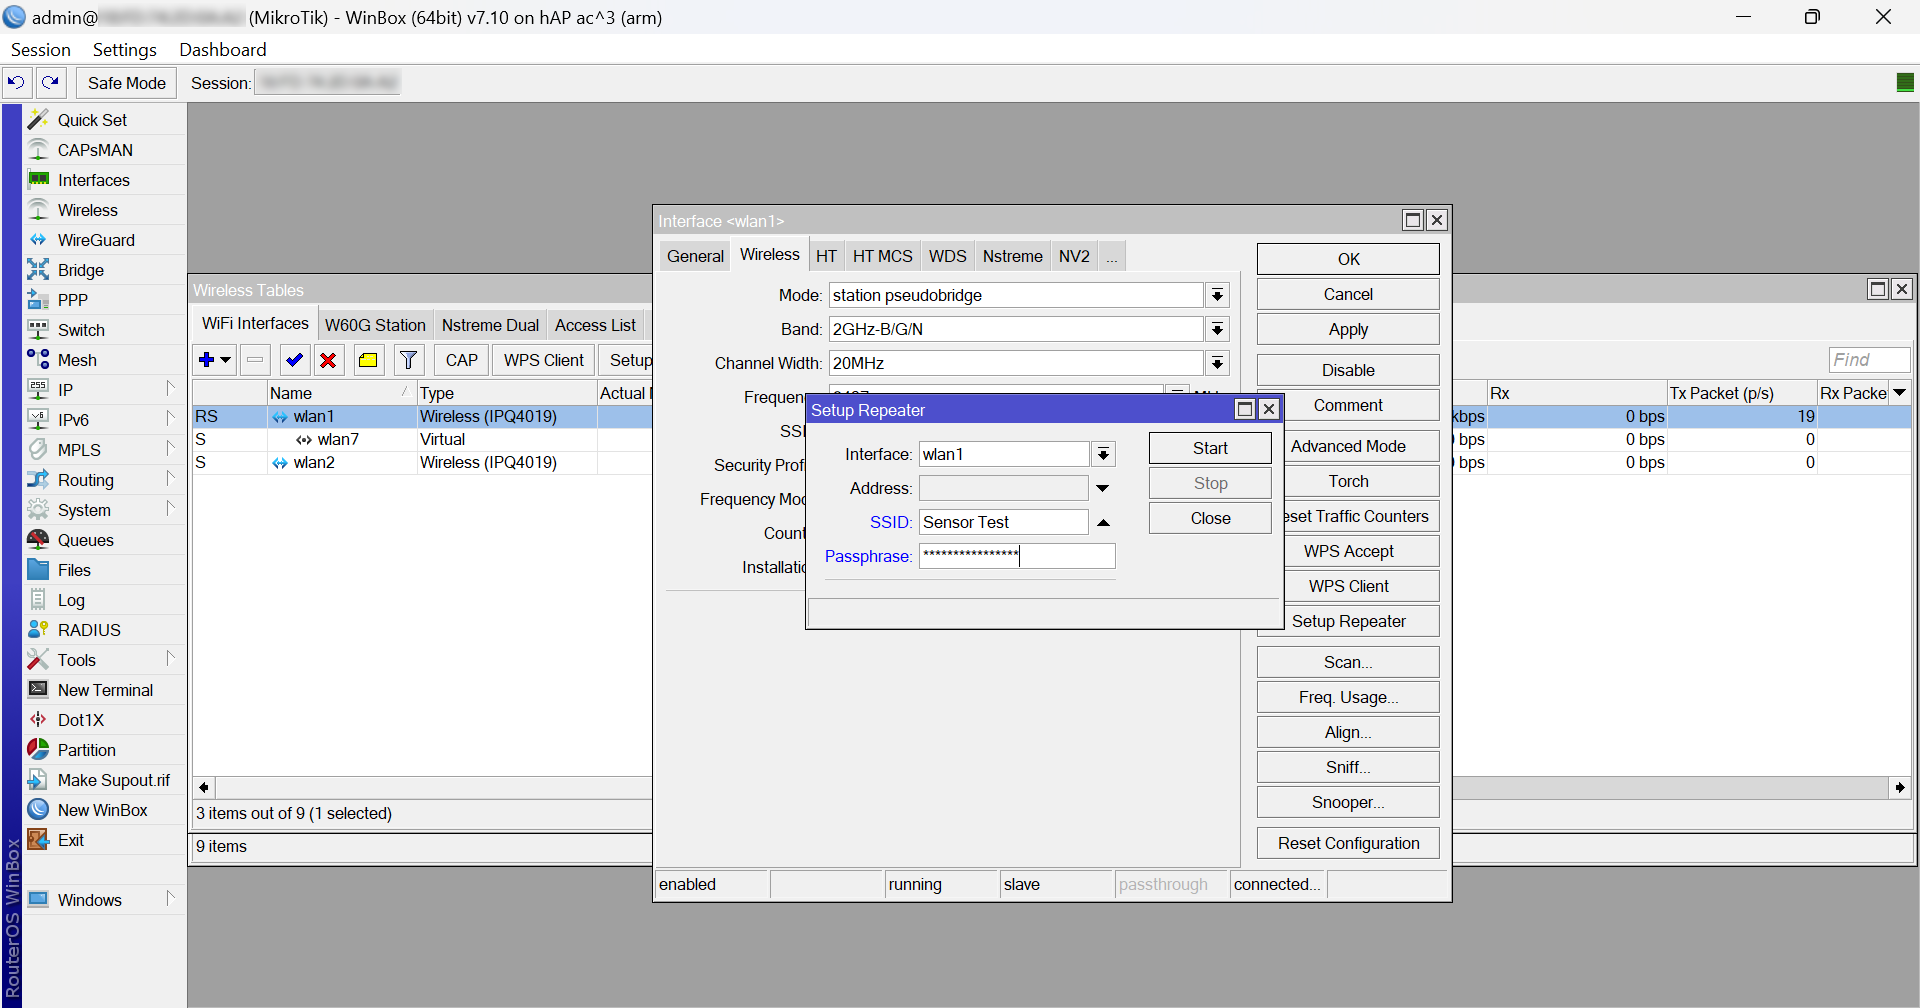
• Go to the Wireless settings and enable both wlan’s. Pick Wlan 1 if you would like to connect over 2.4ghz or click wlan 2 if your connecting to the upstream router on 5ghz.
• Click on the chosen wlan and then press the wireless tab.
• Select “Setup Repeater” on the right hand side.
• Add your SSID and Password for the upstream router (this will need to be the same as the upstream router), and then press apply.
• This will automatically create a security profile and add it to the WLAN
• Select the Country you are in and choose the mode you want, either station pseudobridge or station bridge.
• Click the security profile on the wireless tab and then click the new repeater profile.
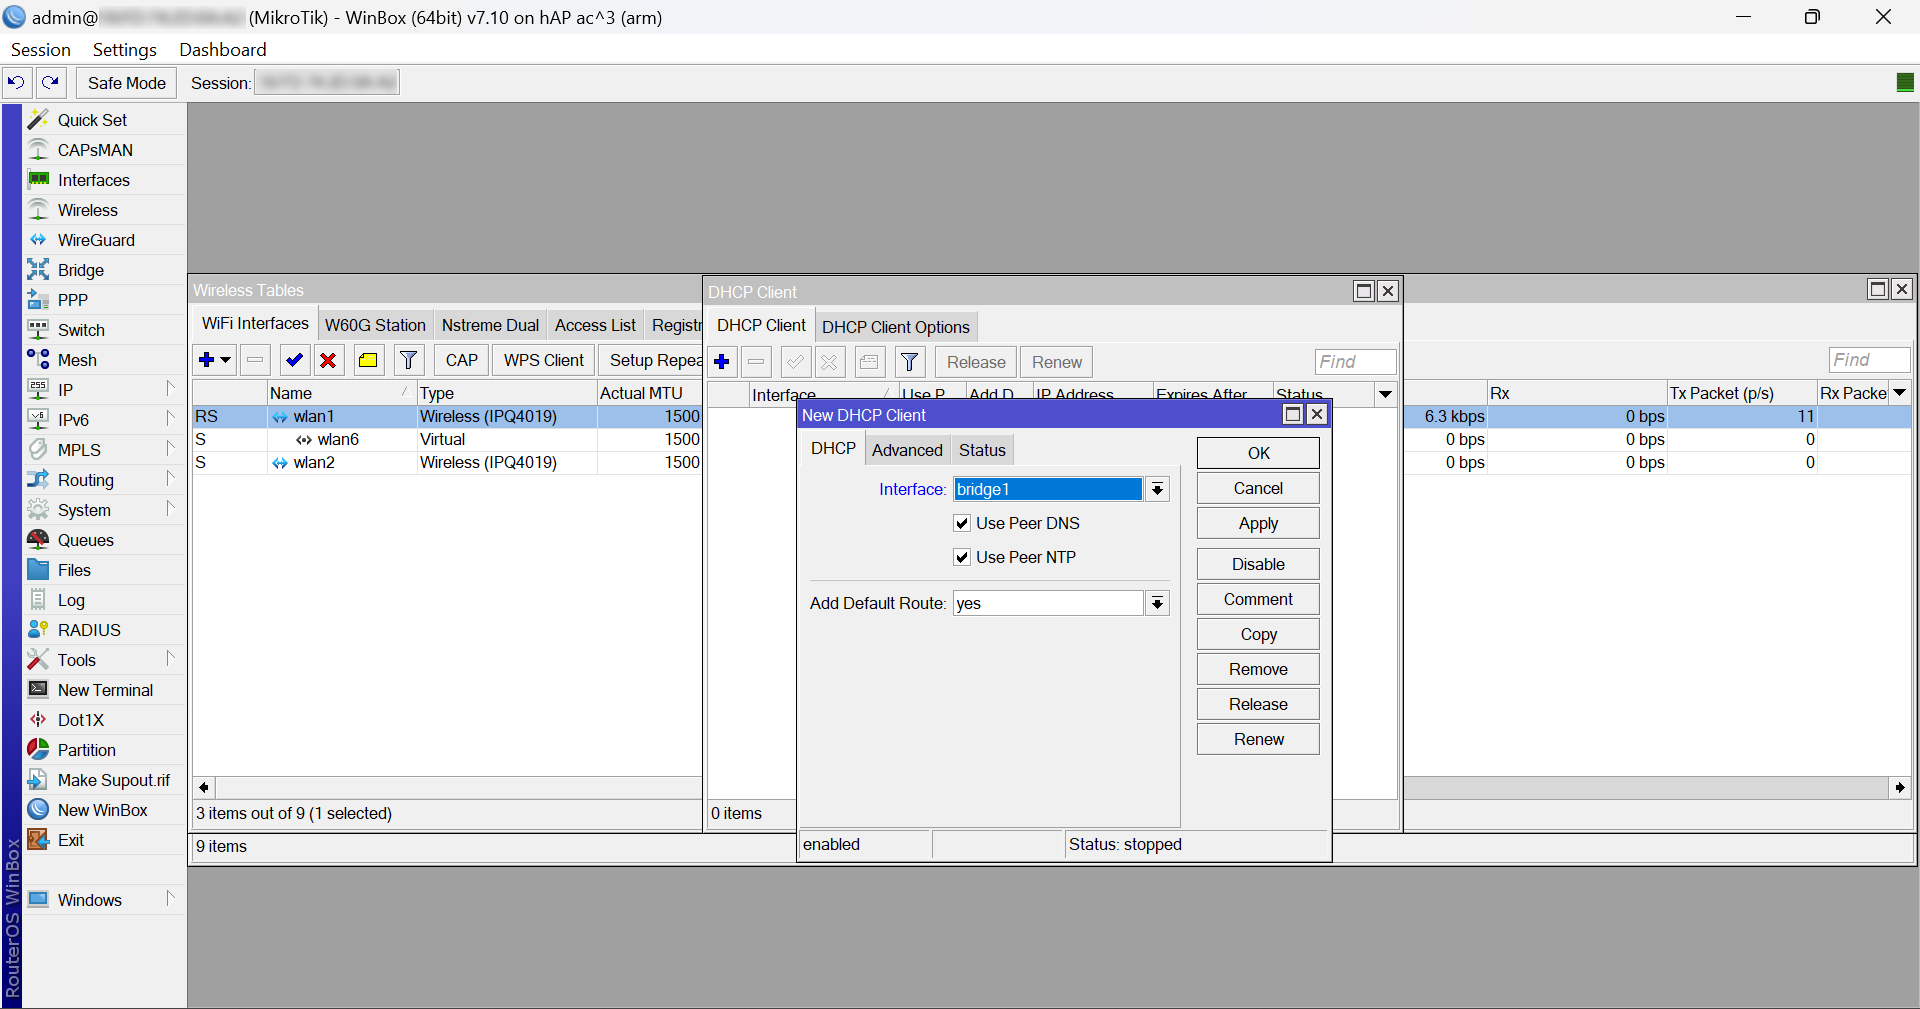
5. Add a DHCP client onto the bridge interface (to get a dynamic IP address from the upstream router).
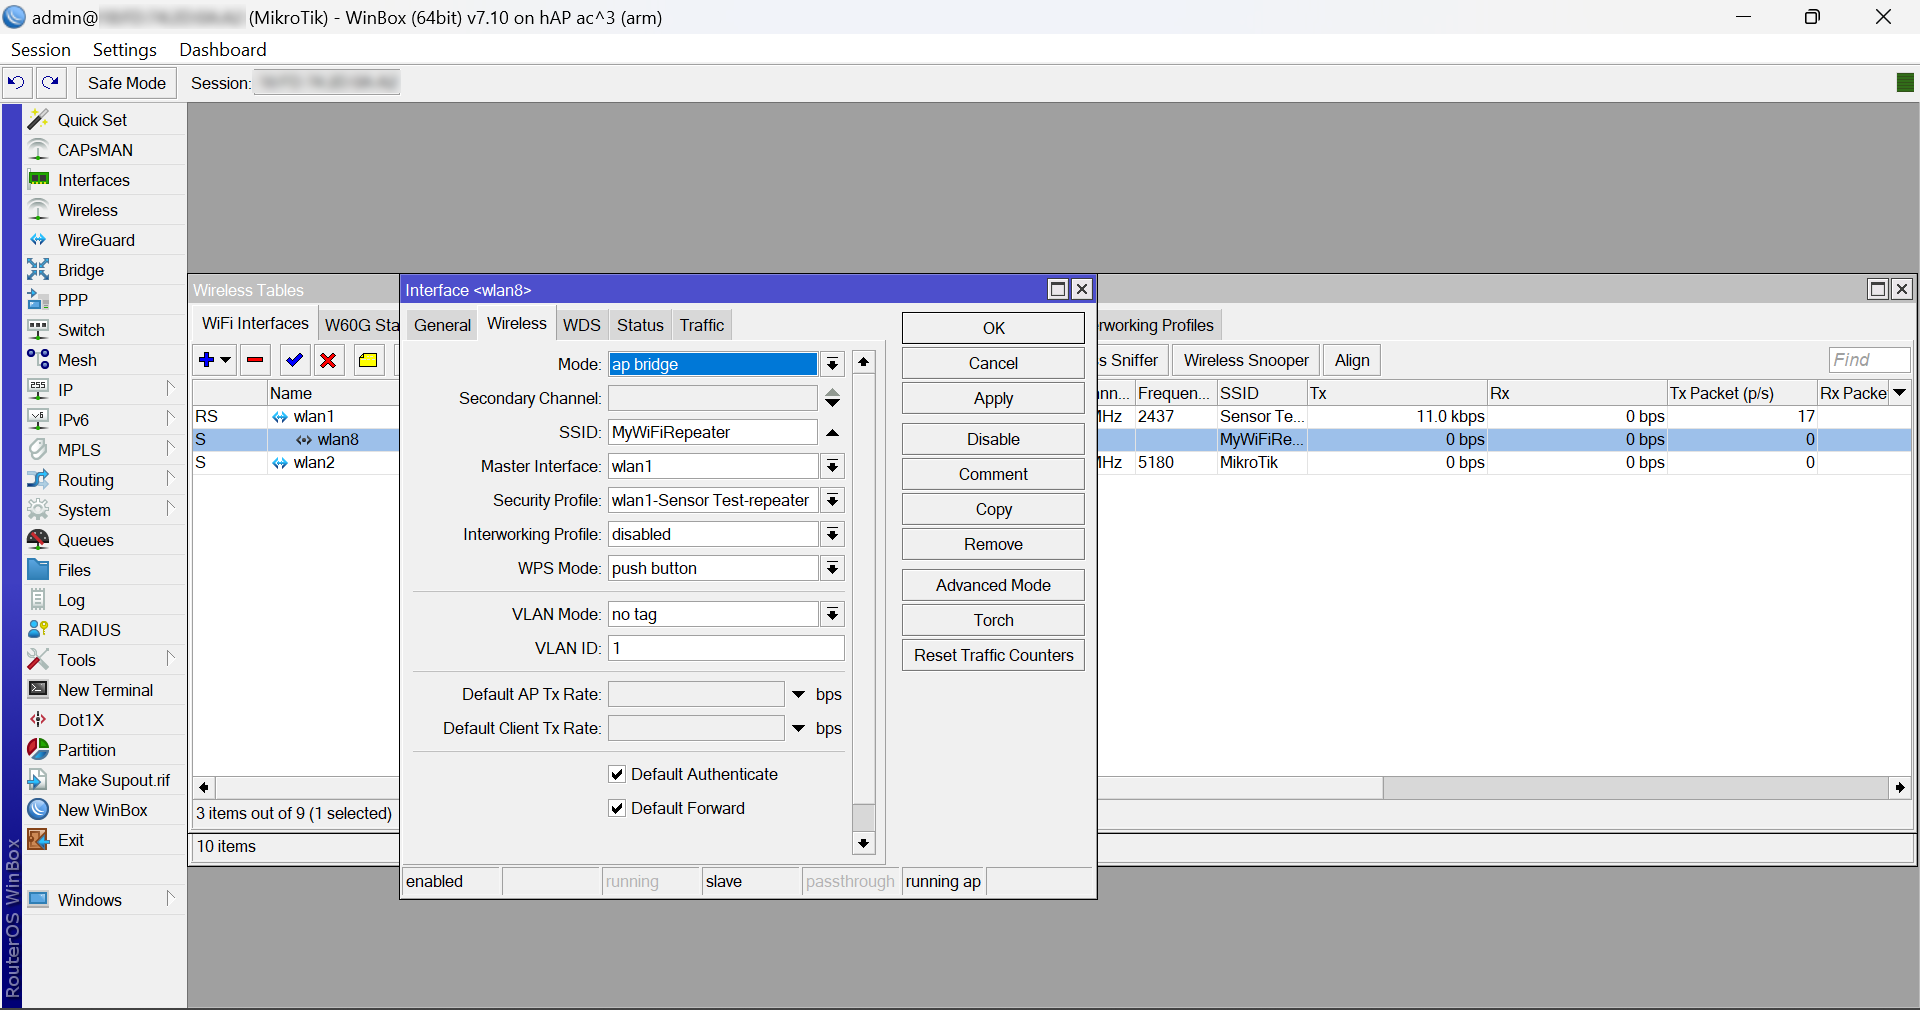
6. Optional step to change the repeater WiFi SSID:
• Navigate to the wireless setting and click the new wlan. Keep this wlan mode as “ap bridge”.
• Click the wireless tab and then change your SSID.
7. You can now check the route your new Mikrotik is taking.
Navigate to you command prompt or terminal and type “traceroute” if you’re using Linux, or type “tracert” if you’re using Windows.
You should now be able to hard wire directly to the router repeater or utilise the WiFi.
If you have any issues relating to the above guide or have any questions relating to MikroTik routers and other devices, please call our team of experts on 01449 888000 or email shop@linitx.com


Nice blog Nat