LinITX Blog Ubiquiti & MikroTik Wireless Networking Experts

Our customers often ask LinITX.com how to configure APN settings for MikroTik LTE devices they’ve purchased from us, so we thought we’d write this useful guide to help you with the most common ways of configuring a correct setup.
I’ve just received my MikroTik LTE router, what do I do now to get it working with my SIM?
Whilst the LTE equipment will come with a defult APN profile set up to try and work with as many network providers as possible out of the box, we would always recommend taking 5 minutes to manually enter the APN details for your chosen network provider when you receive your product to ensure a reliable connection going forwards.
How do I configure the APN settings?
We would recommend downloading the WinBox tool from MikroTik’s downloads page to run through these changes but they can also be applied through WebFig.
1) Open WinBox and select the device from the “Neighbours” tab and log in. -OR- Go to the devices IP address in your browser to open WebFig (Default IP and credentials can be found in the manual included).
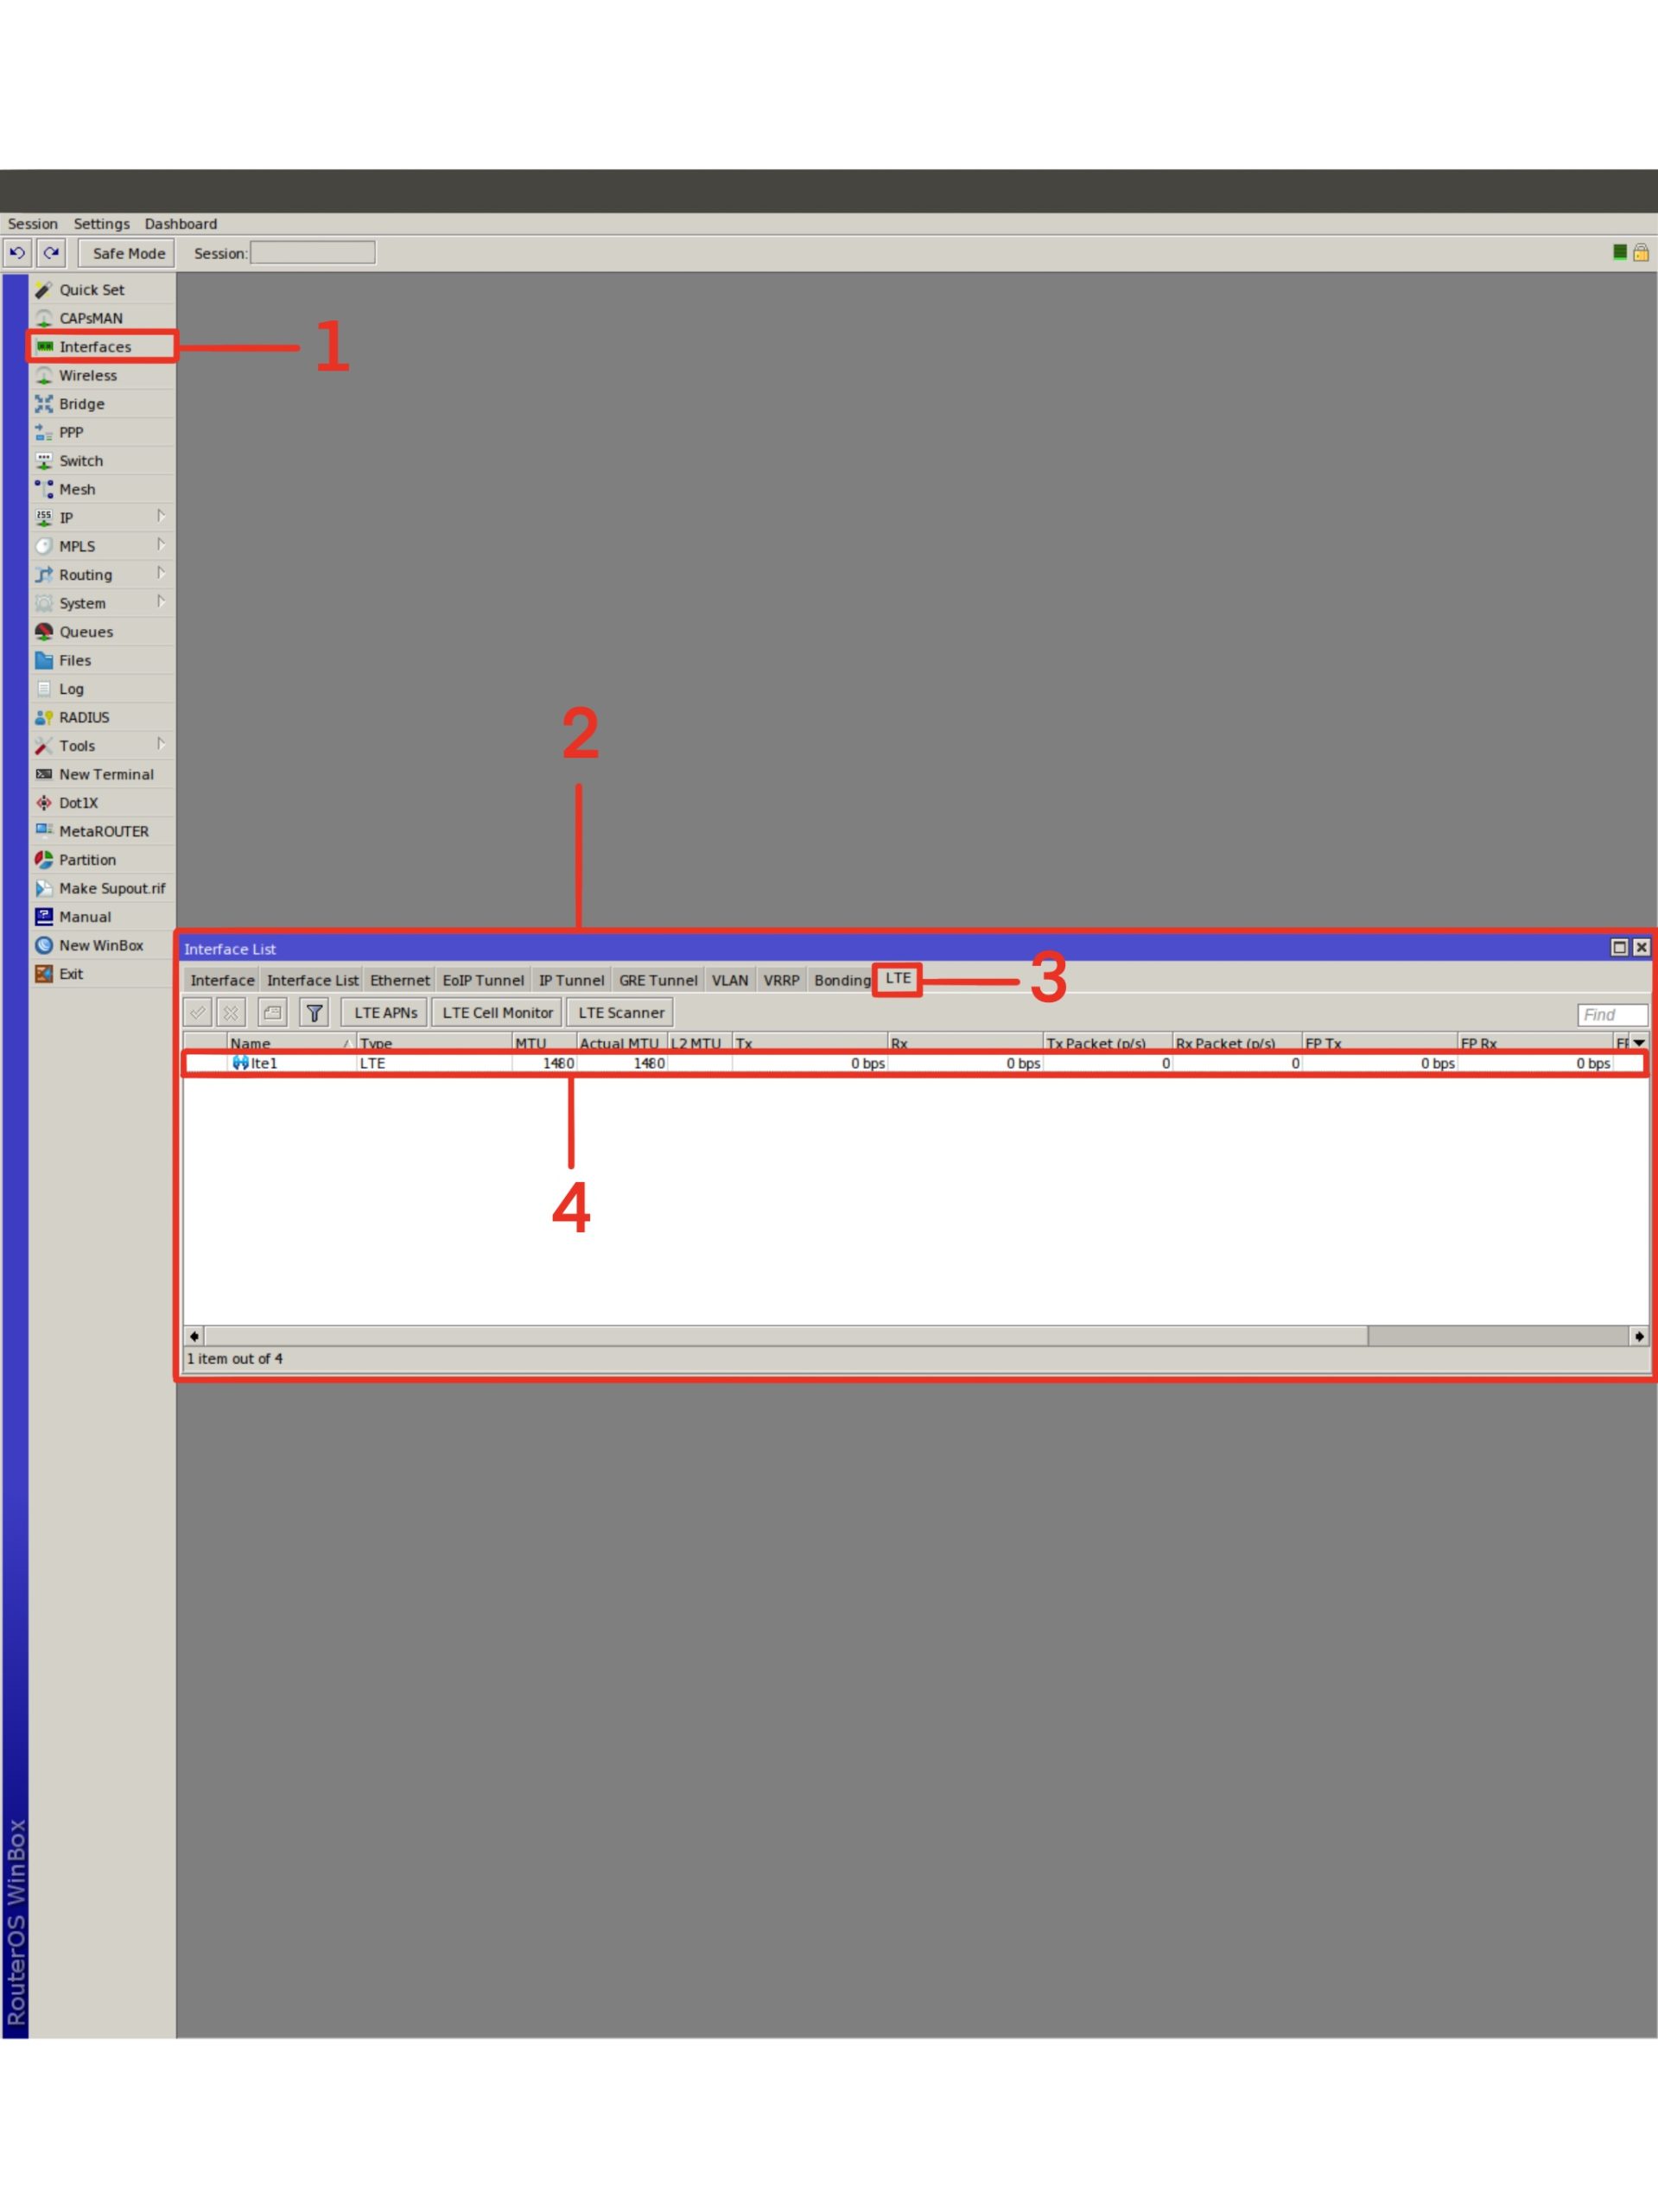
2) On the left hand side of the window/webpage, click on the Interfaces menu option to open the Interface list, then go to the LTE (tab) and click the LTE APNs button (Fig. 1/1a).
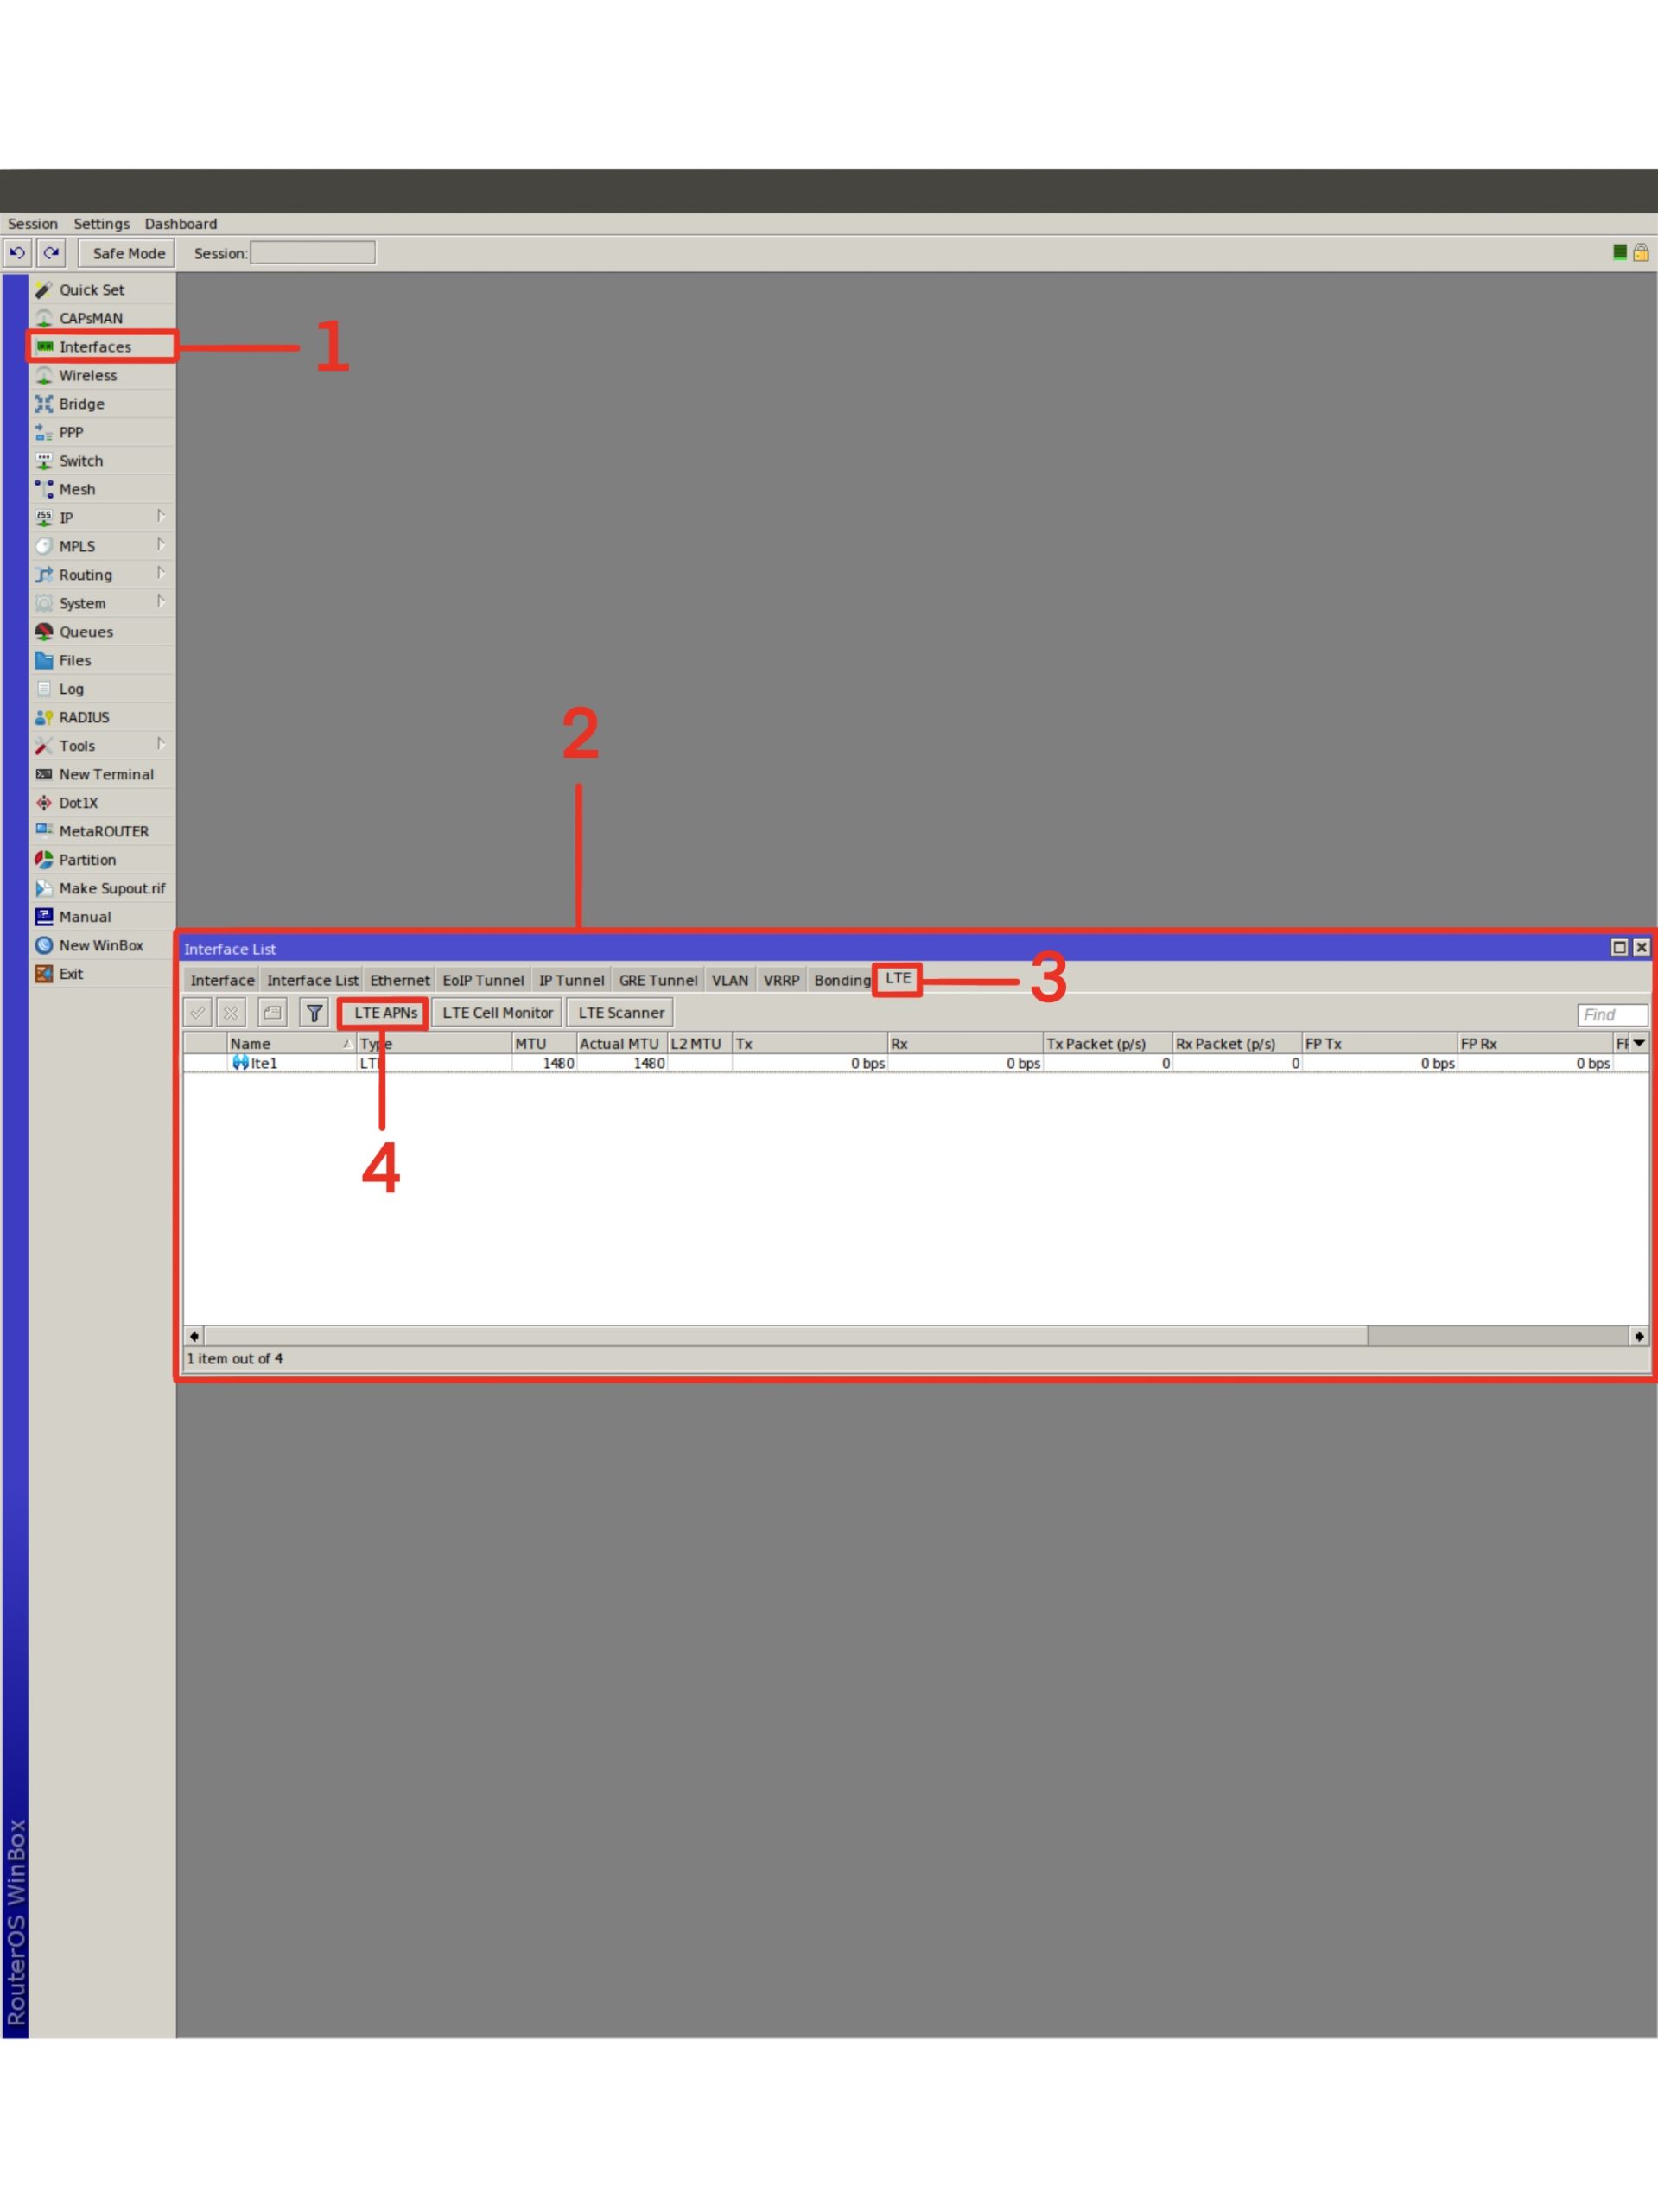
Fig 1a: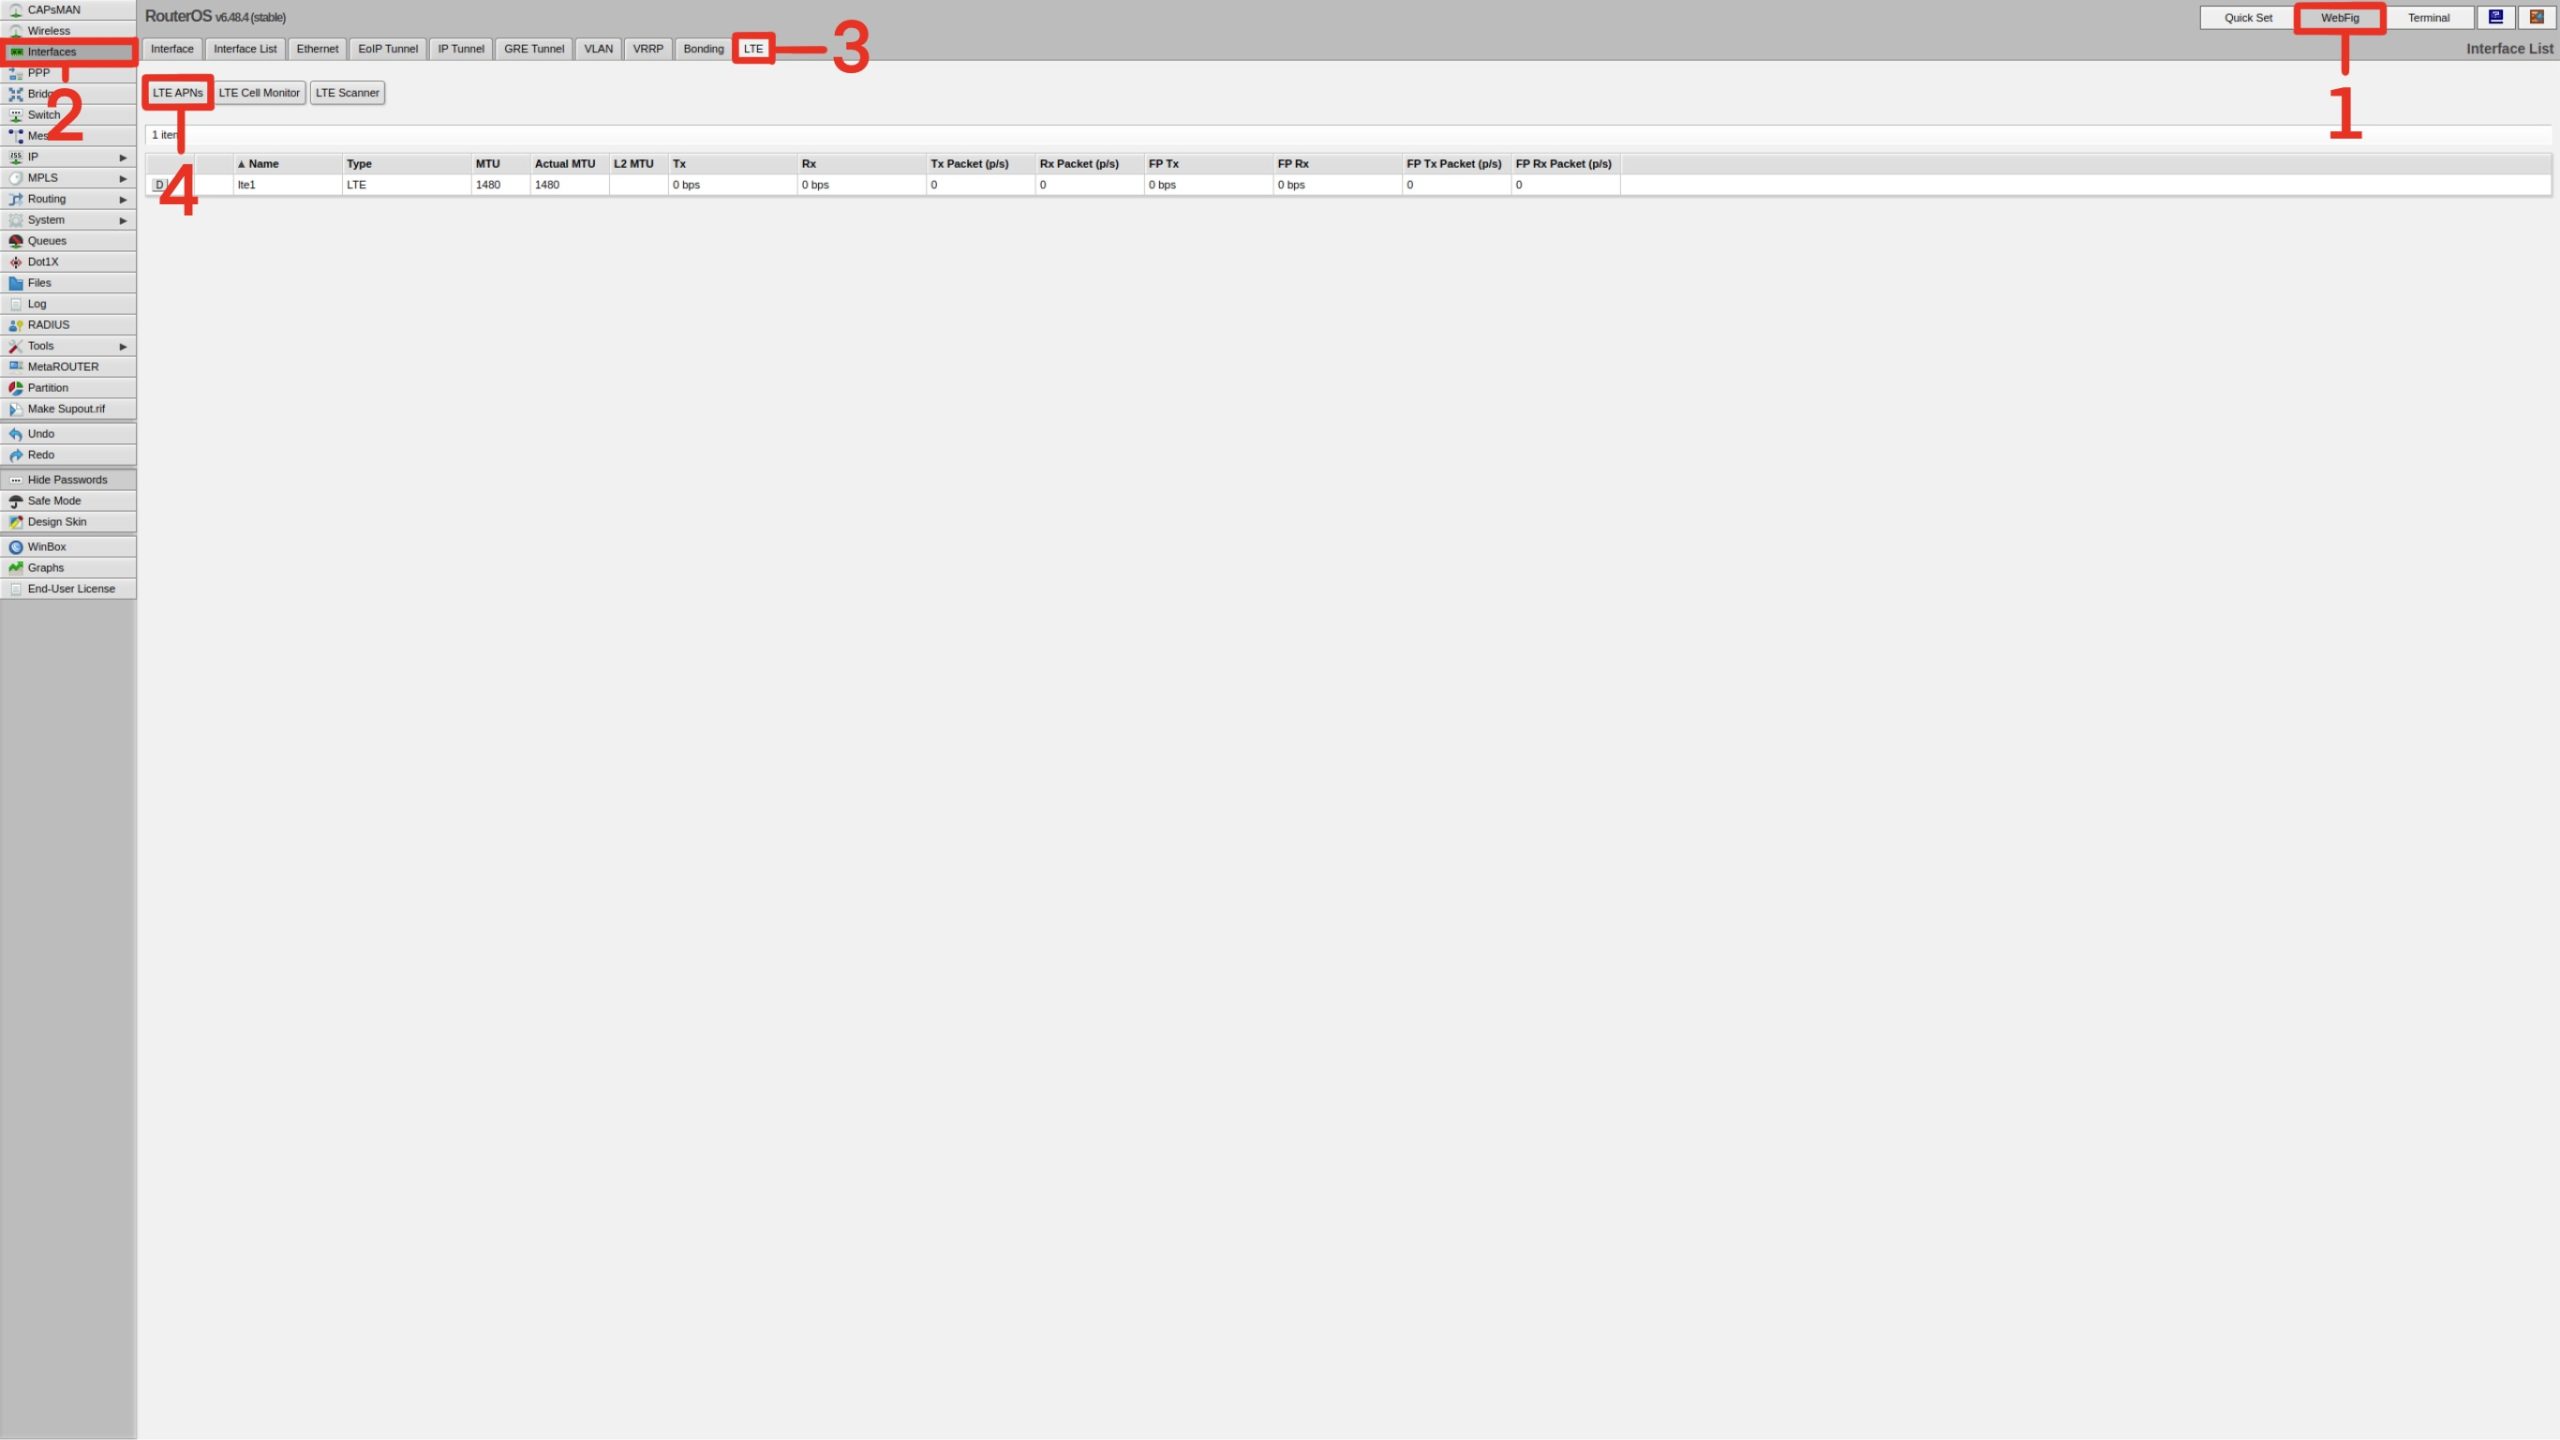
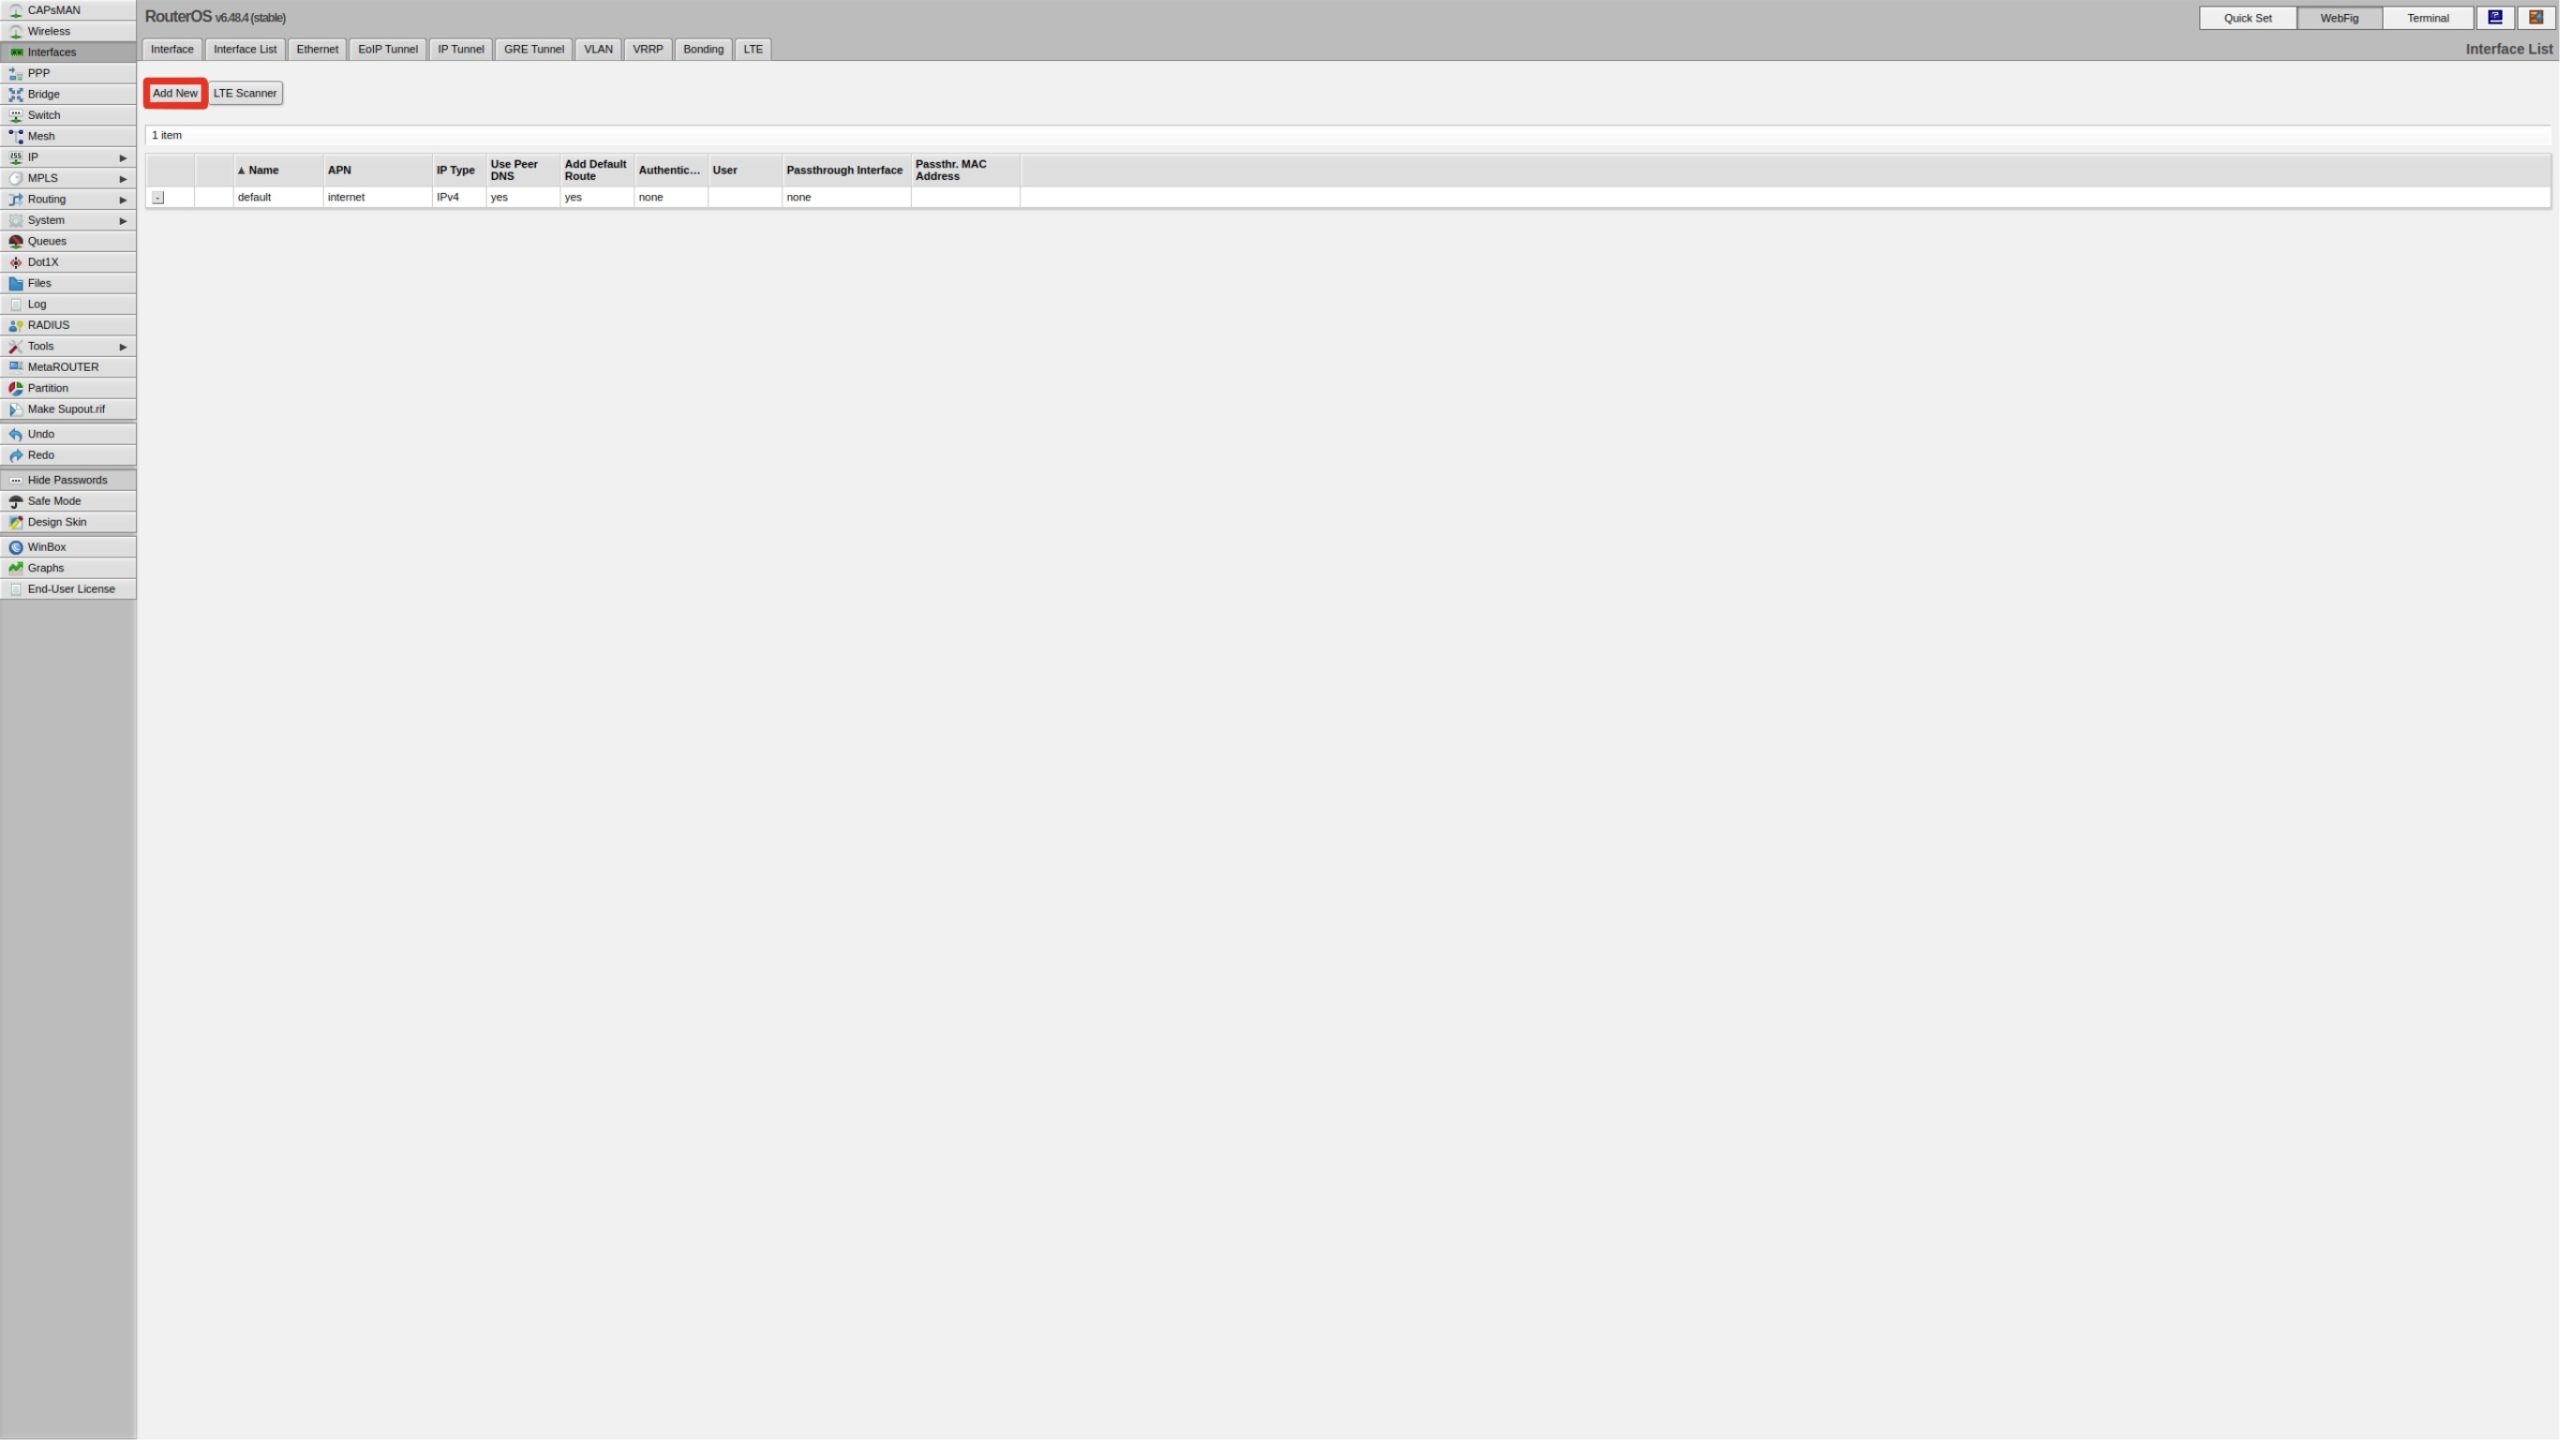
3) Create a new APN profile by clicking on the + icon (Winbox) or “Add New” button (WebFig), giving it a name and inserting the APN settings for your network provider of choice, before applying these settings (Fig. 2/2a&b).
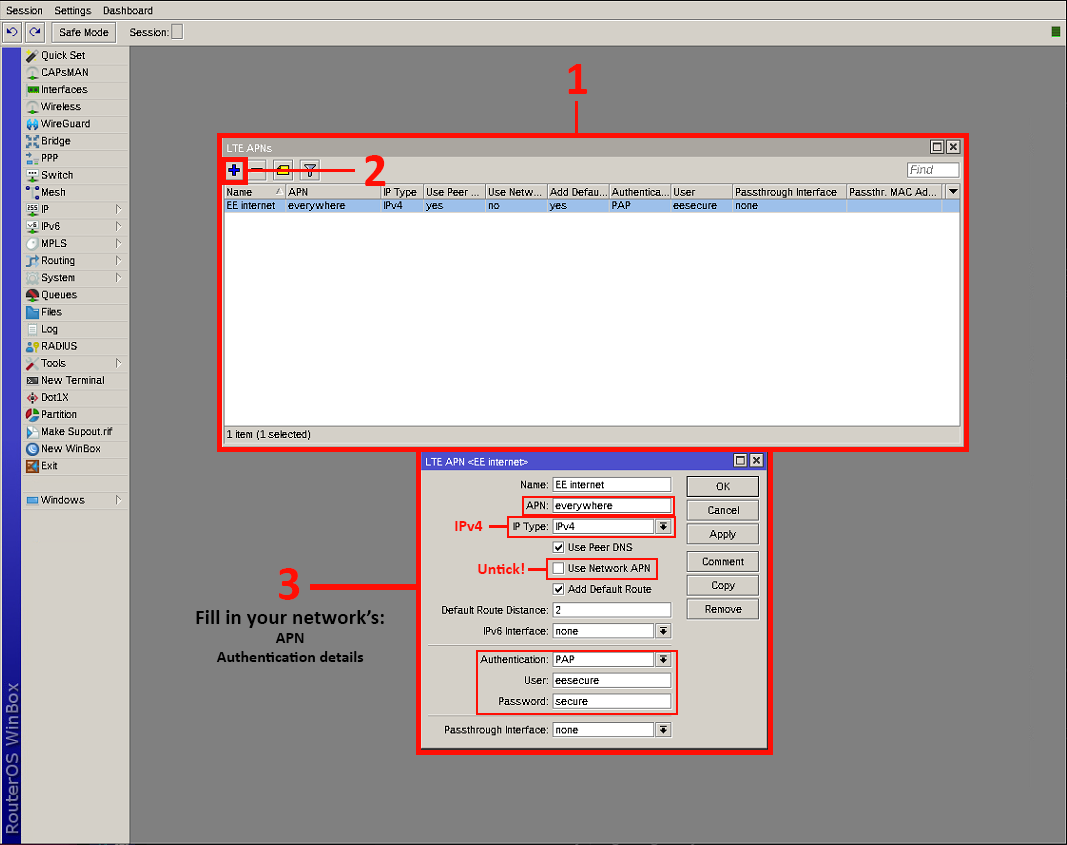
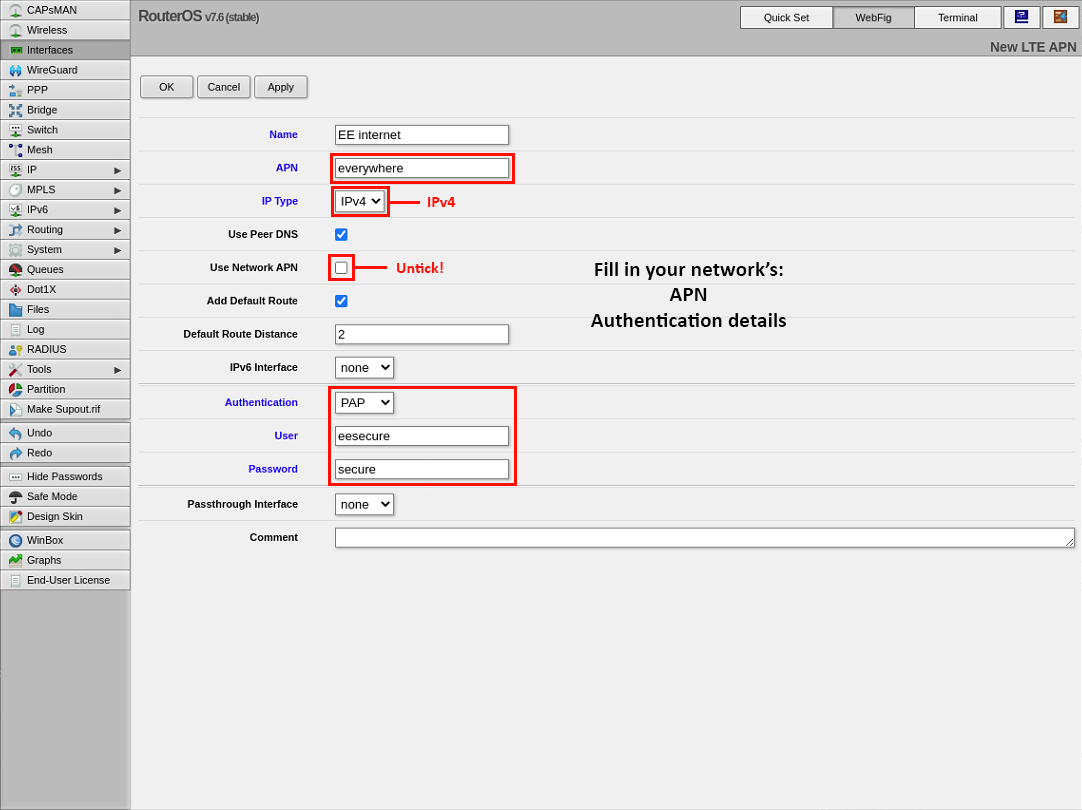
NOTE: Some network providers have a different APN’s for Pay as you Go and Contract SIMS. Make sure you insert the correct ones for your SIM type.
I will be using EE network as an example for putting in APN settings. Check your network provider and use their APN settings to configure your device!
You should now see that your new APN profile is listed in the LTE APNs window.
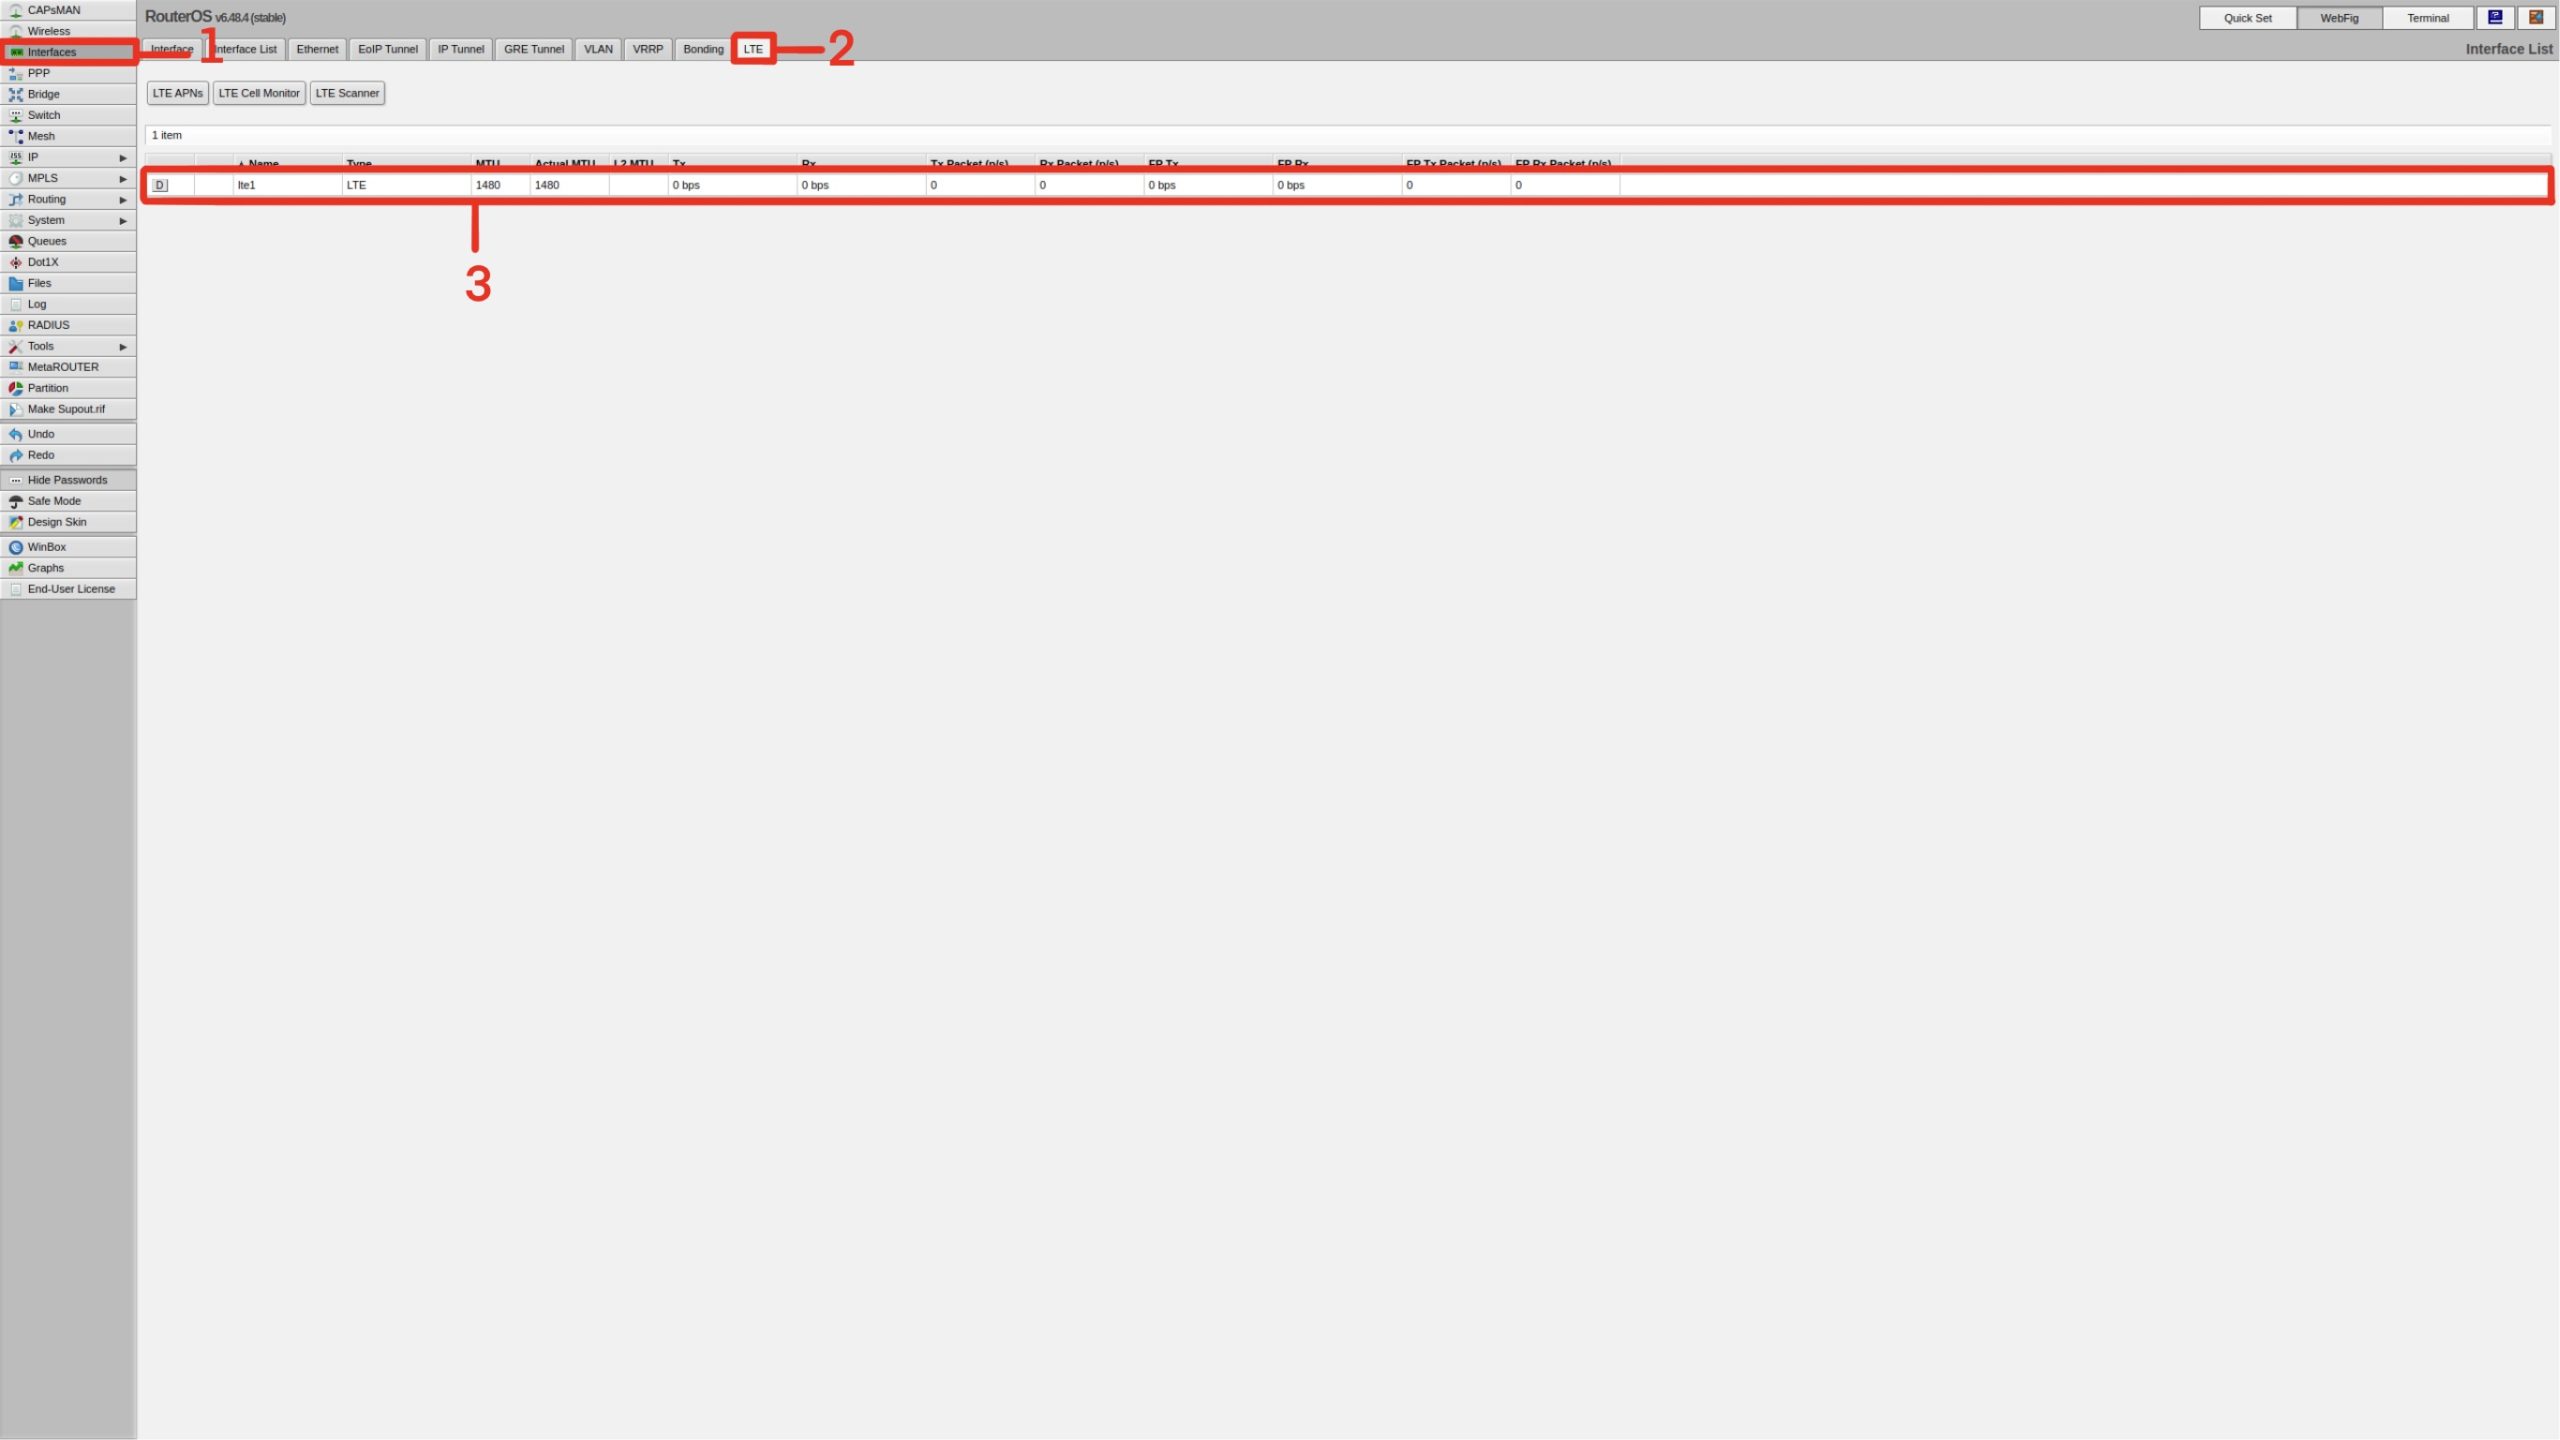
4) Go Back to Interfaces > Interface List > LTE (tab) and double click on the lte1 interface listed (Fig. 3/3a).
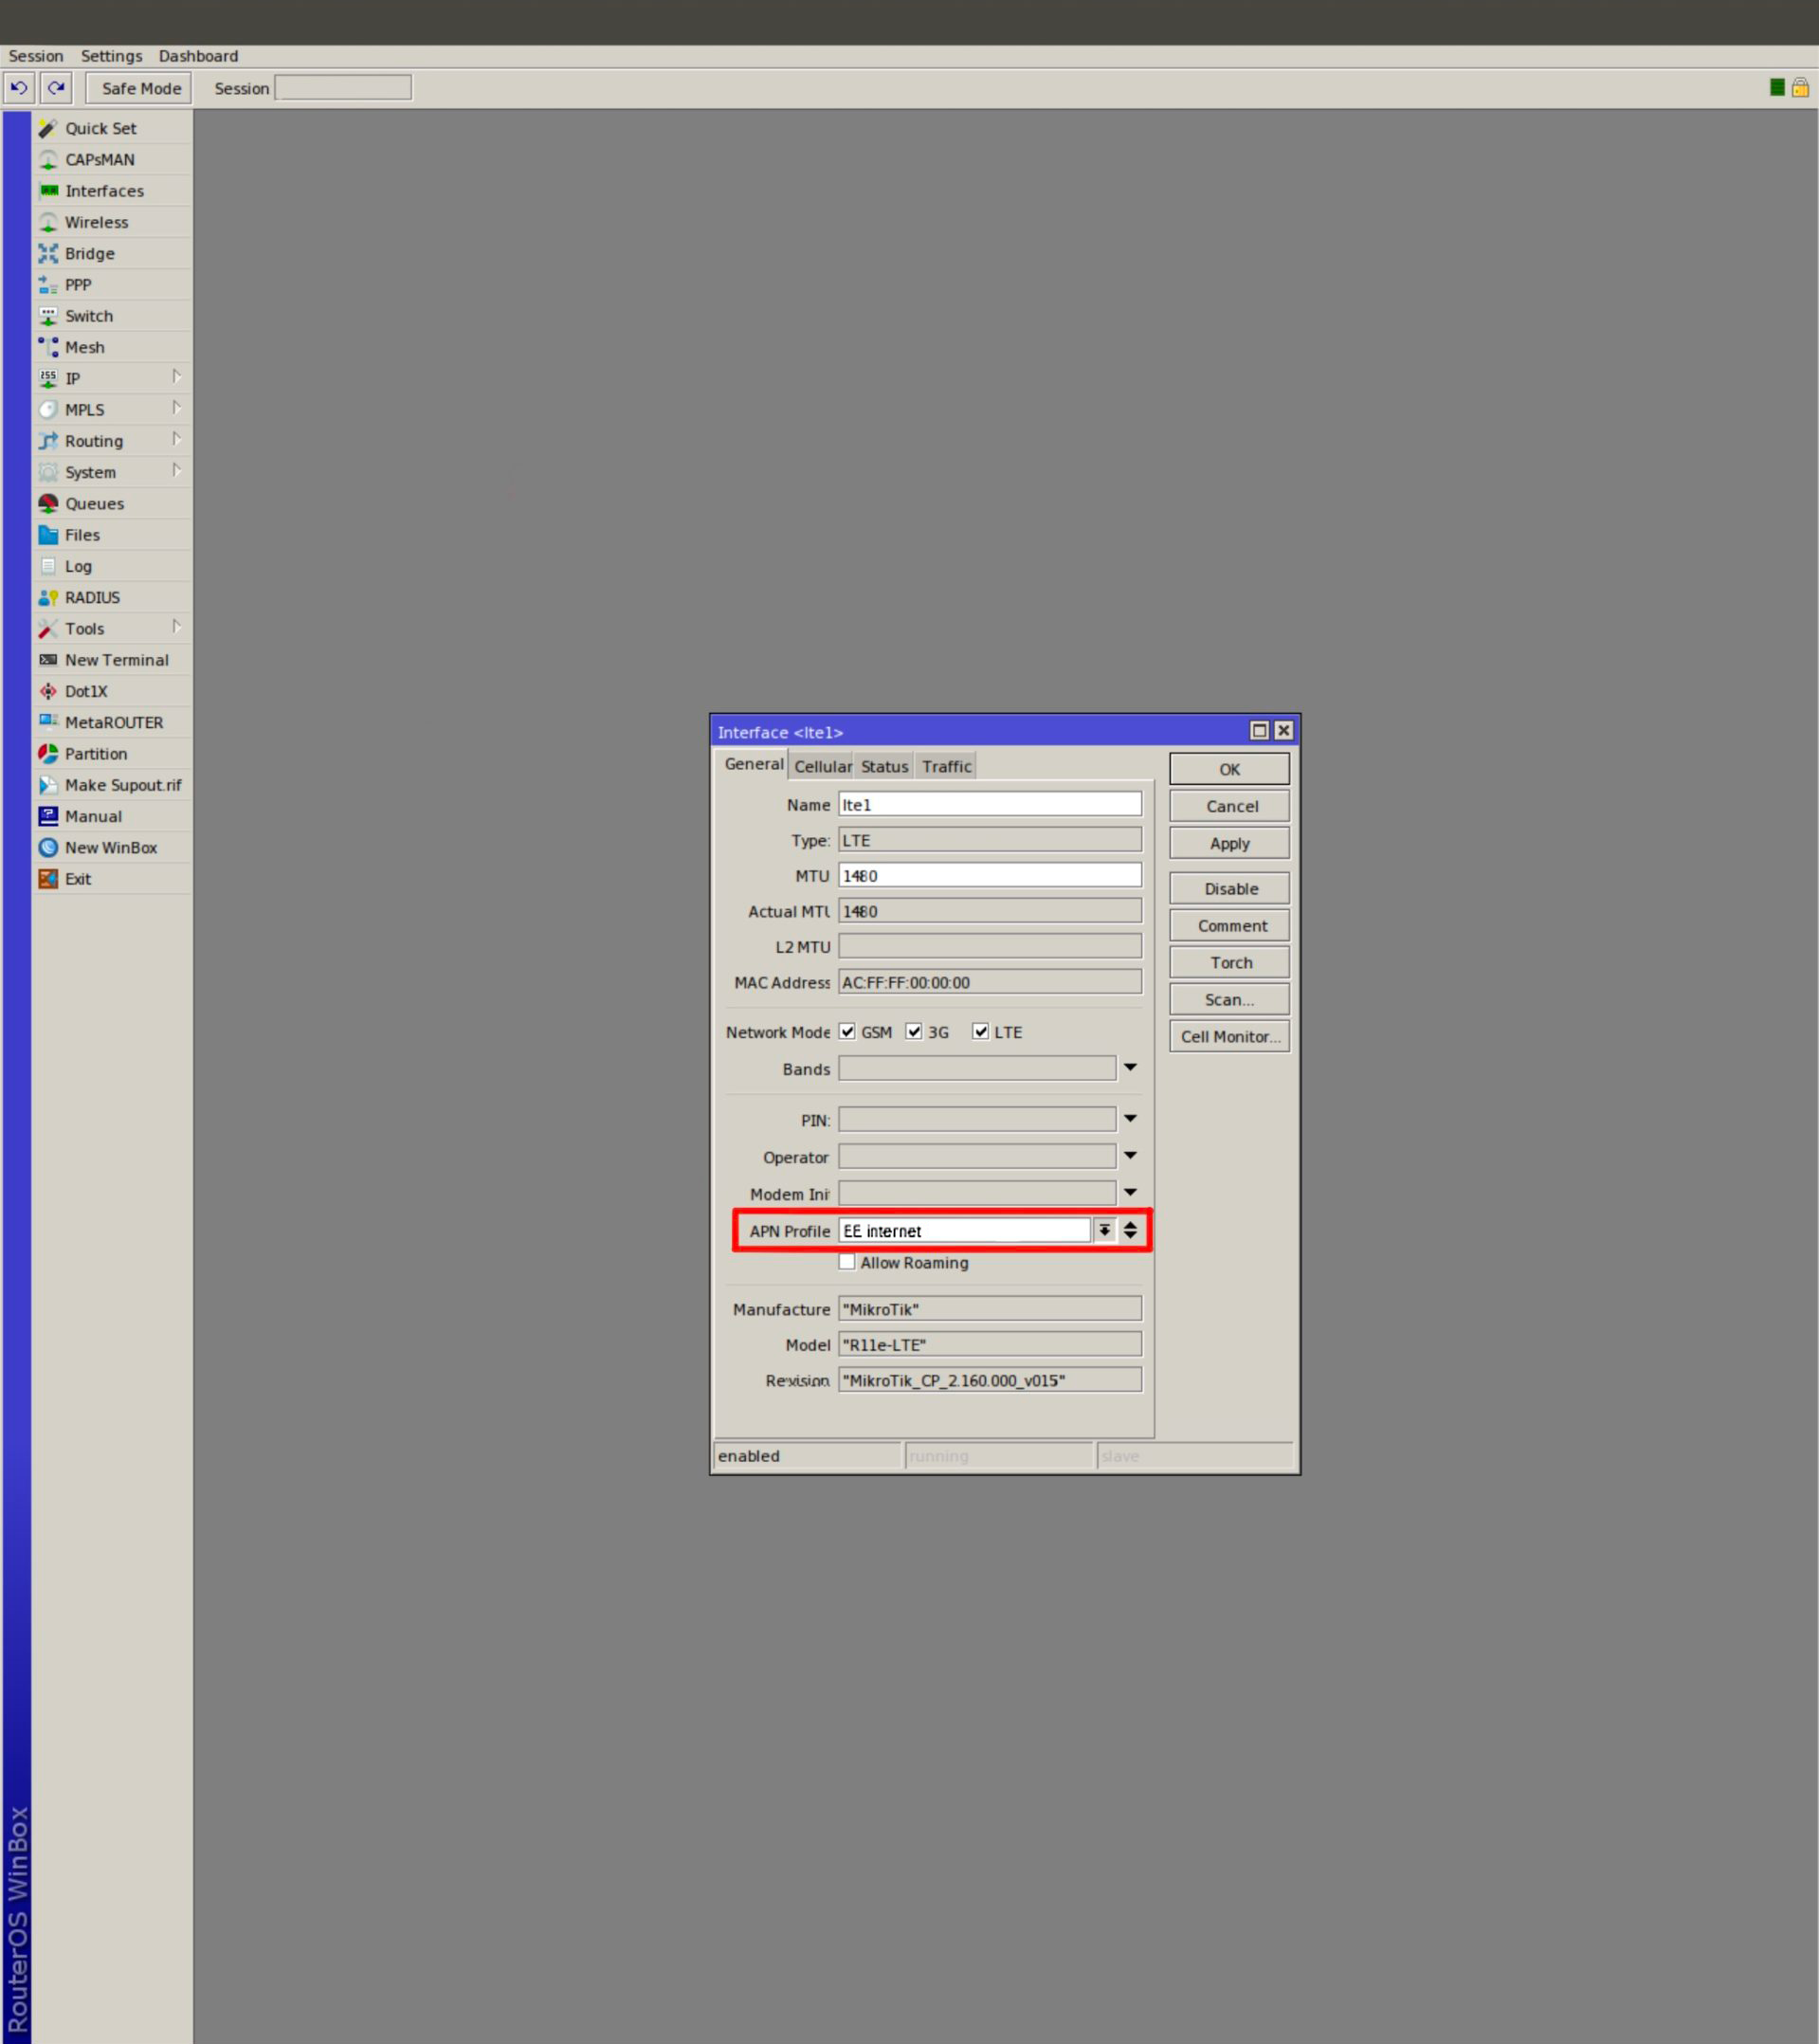
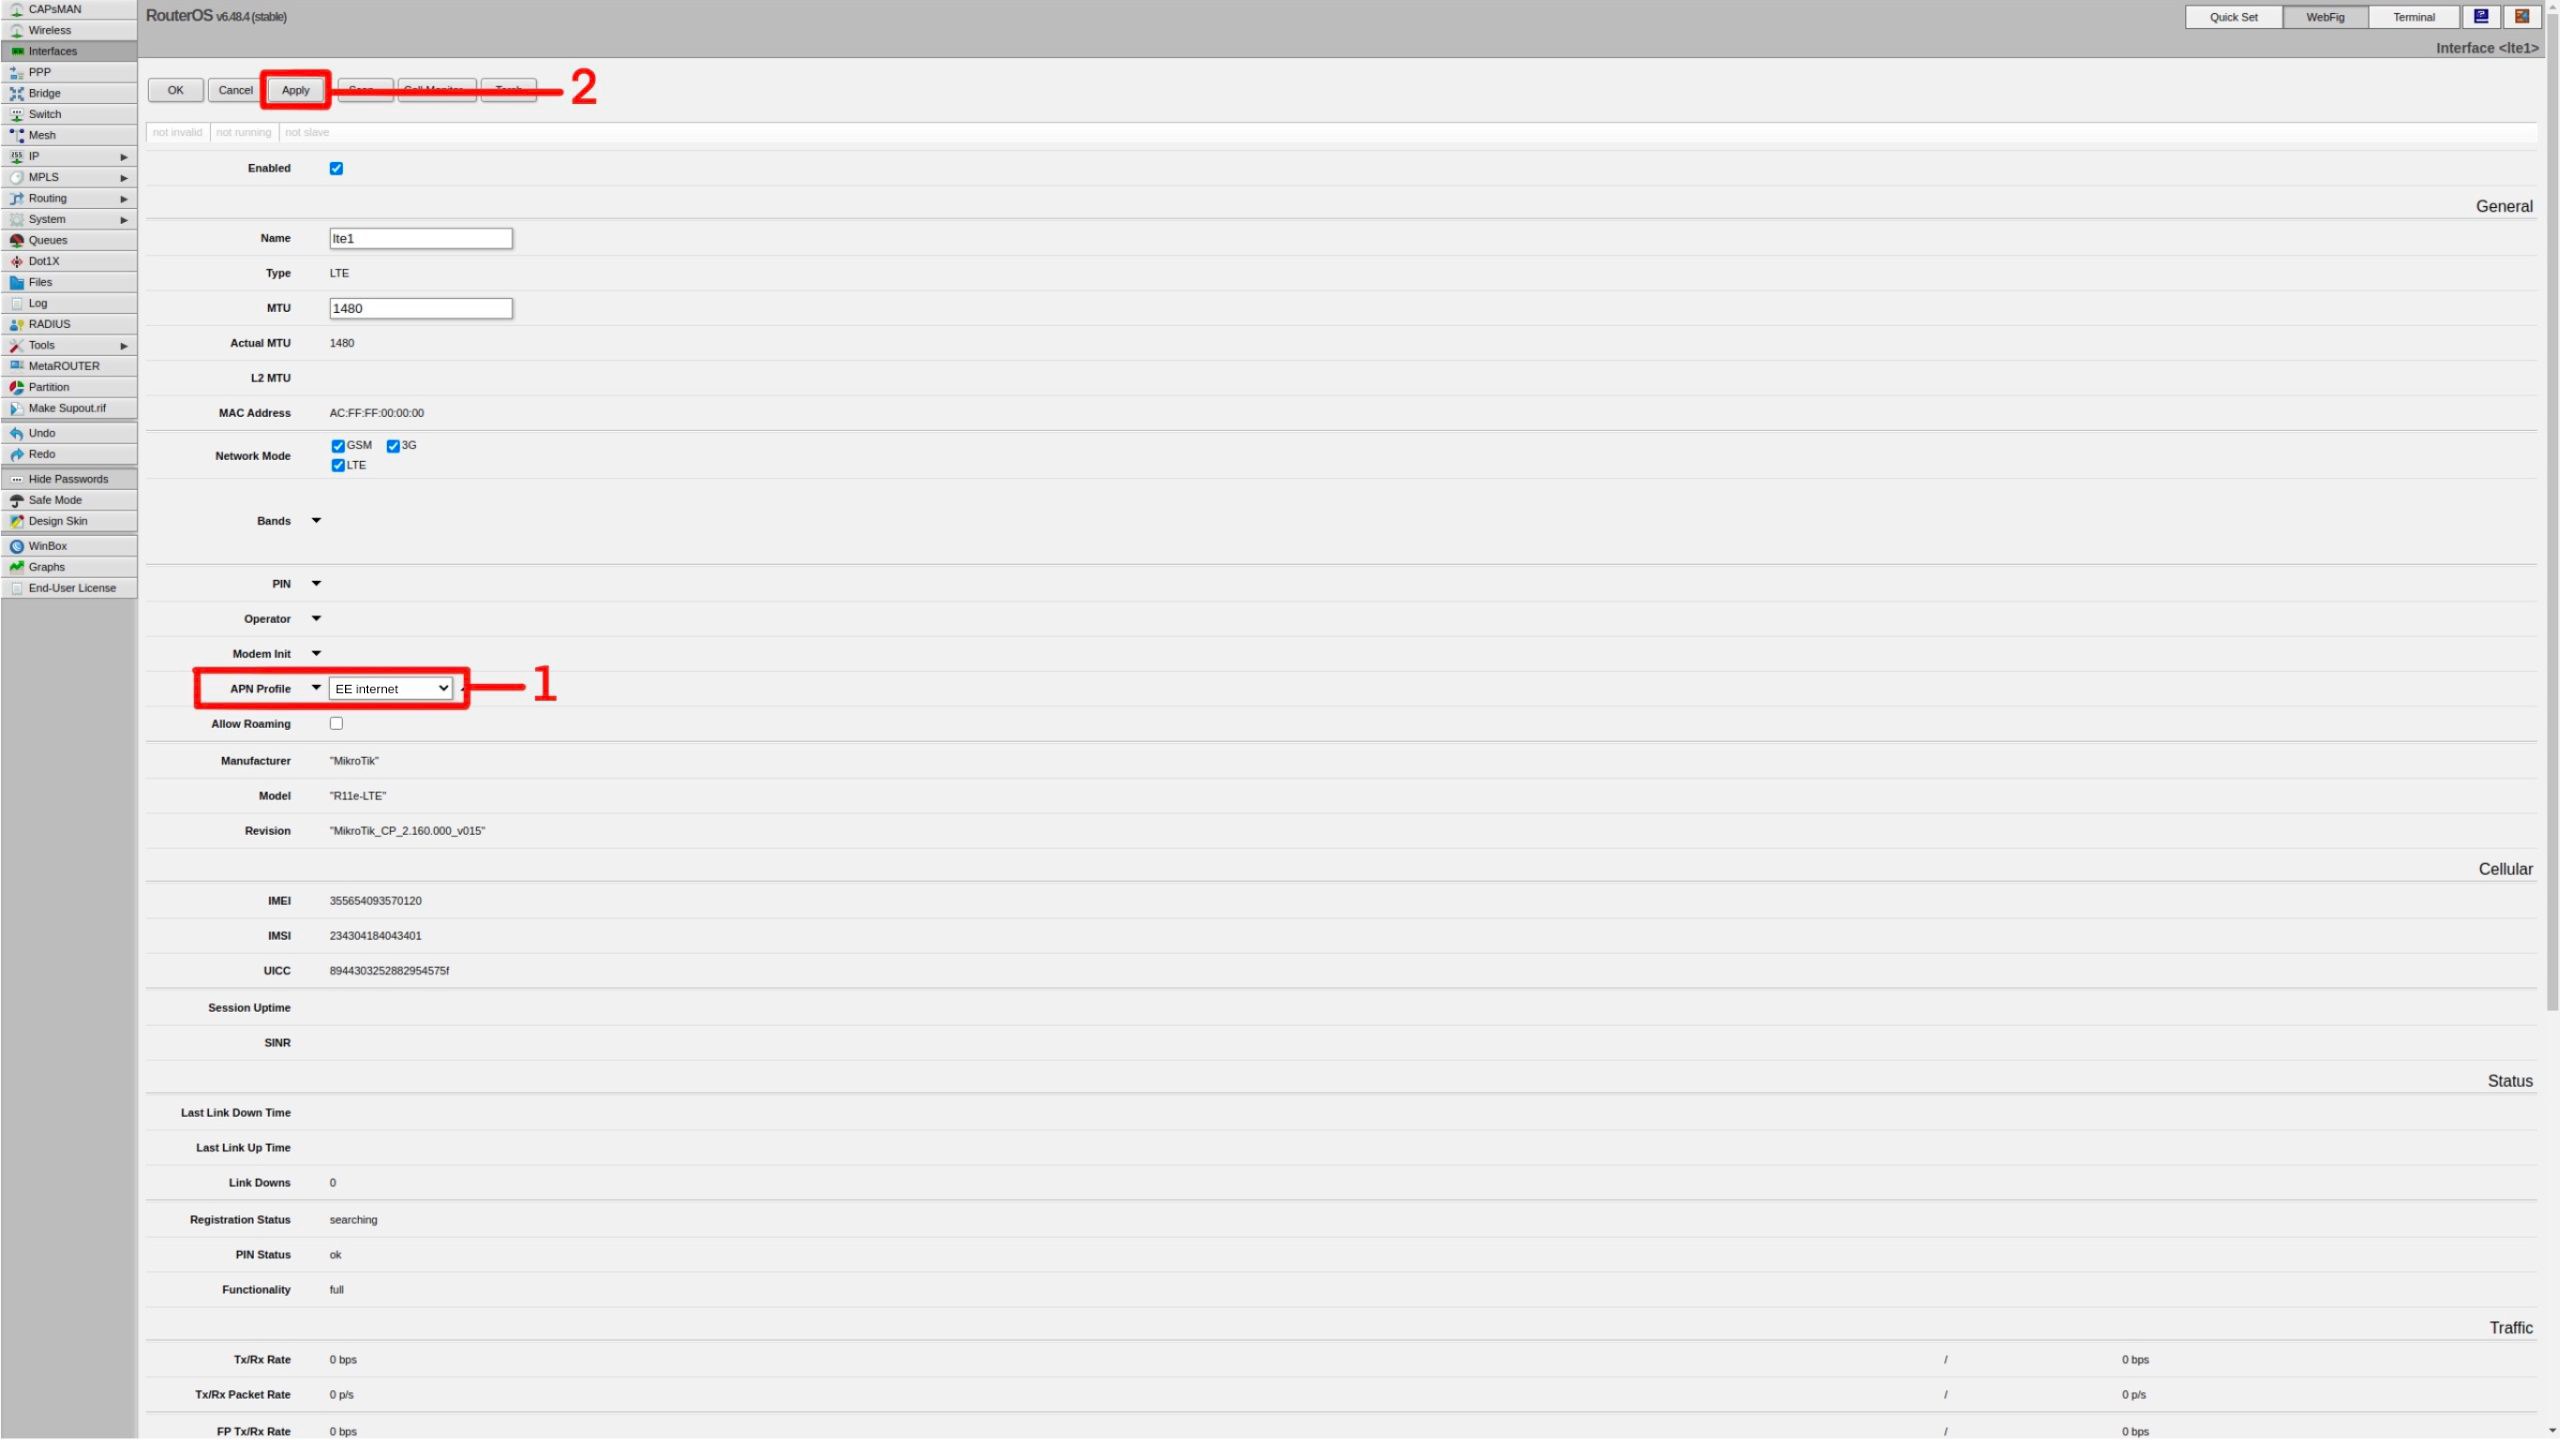
5) In the interface window that appears, there will be a drop down box for selecting the APN Profile. Click on the drop down and select your new APN profile before clicking Apply (Fig. 4/4a).
6) If using Winbox, you should now be able to go to the Status tab (Winbox) in the lte1 interface window or scroll down to Status section (WebFig) and see the following information: (Fig. 5/5a)
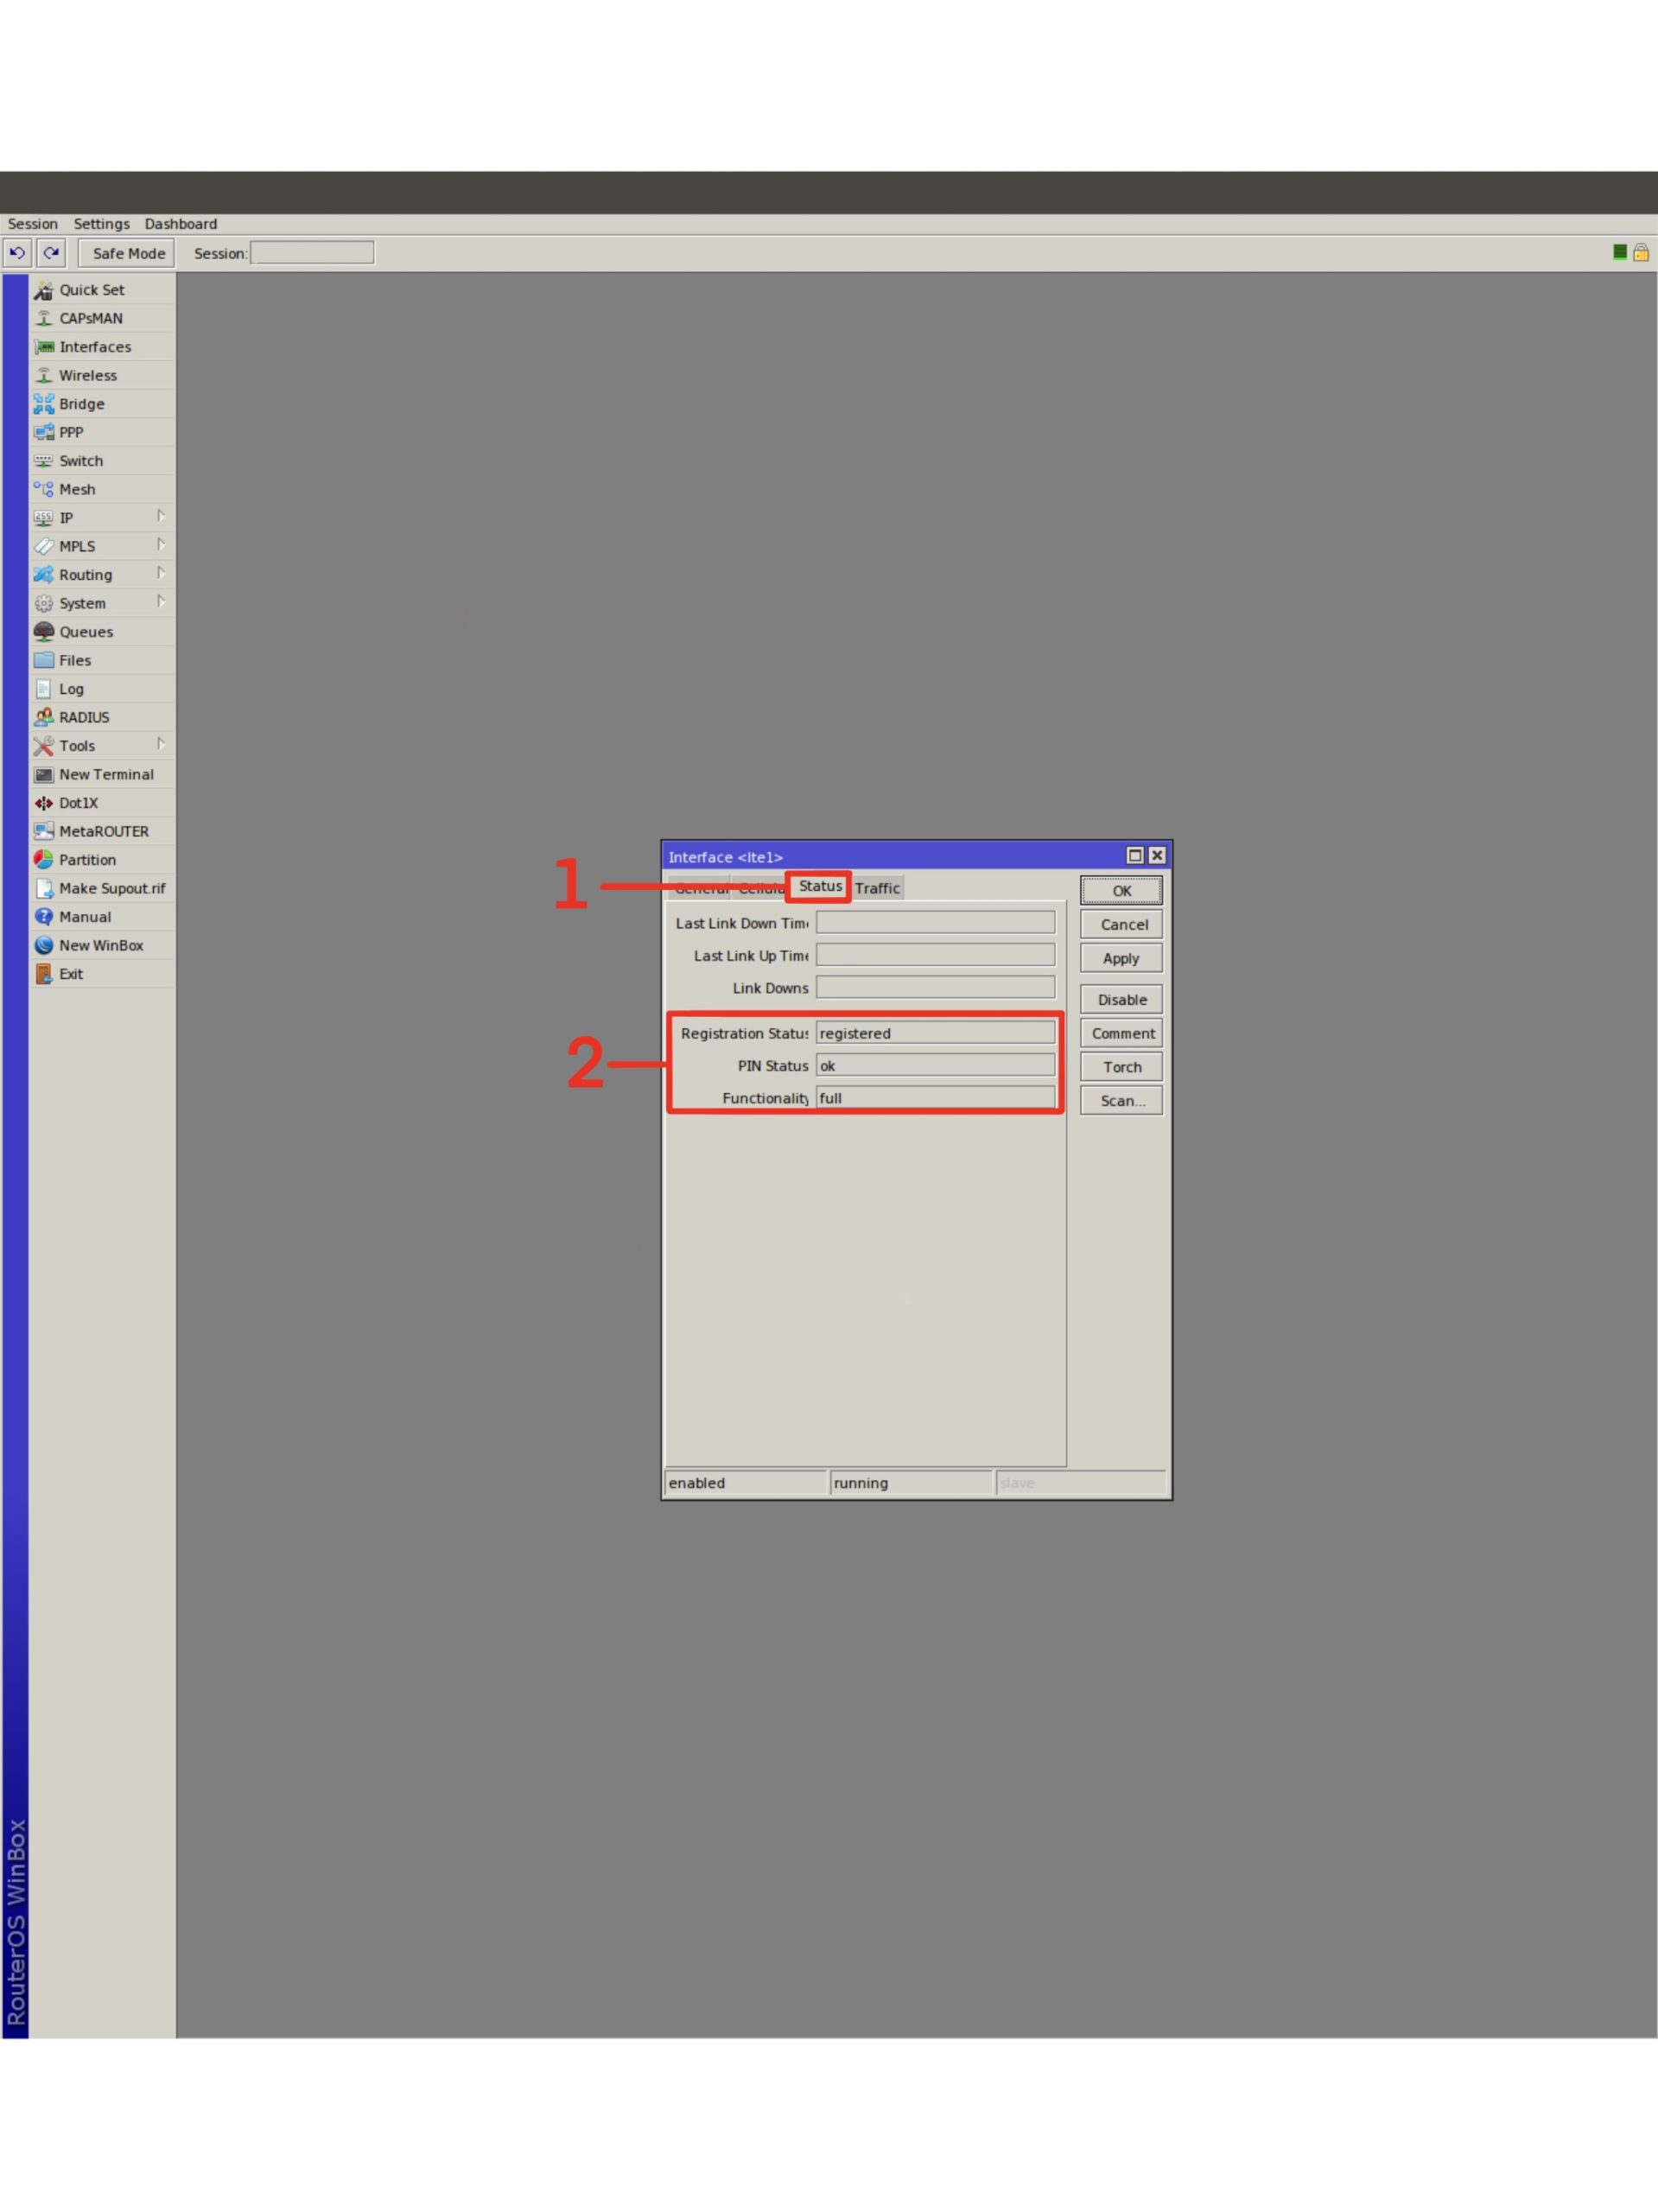
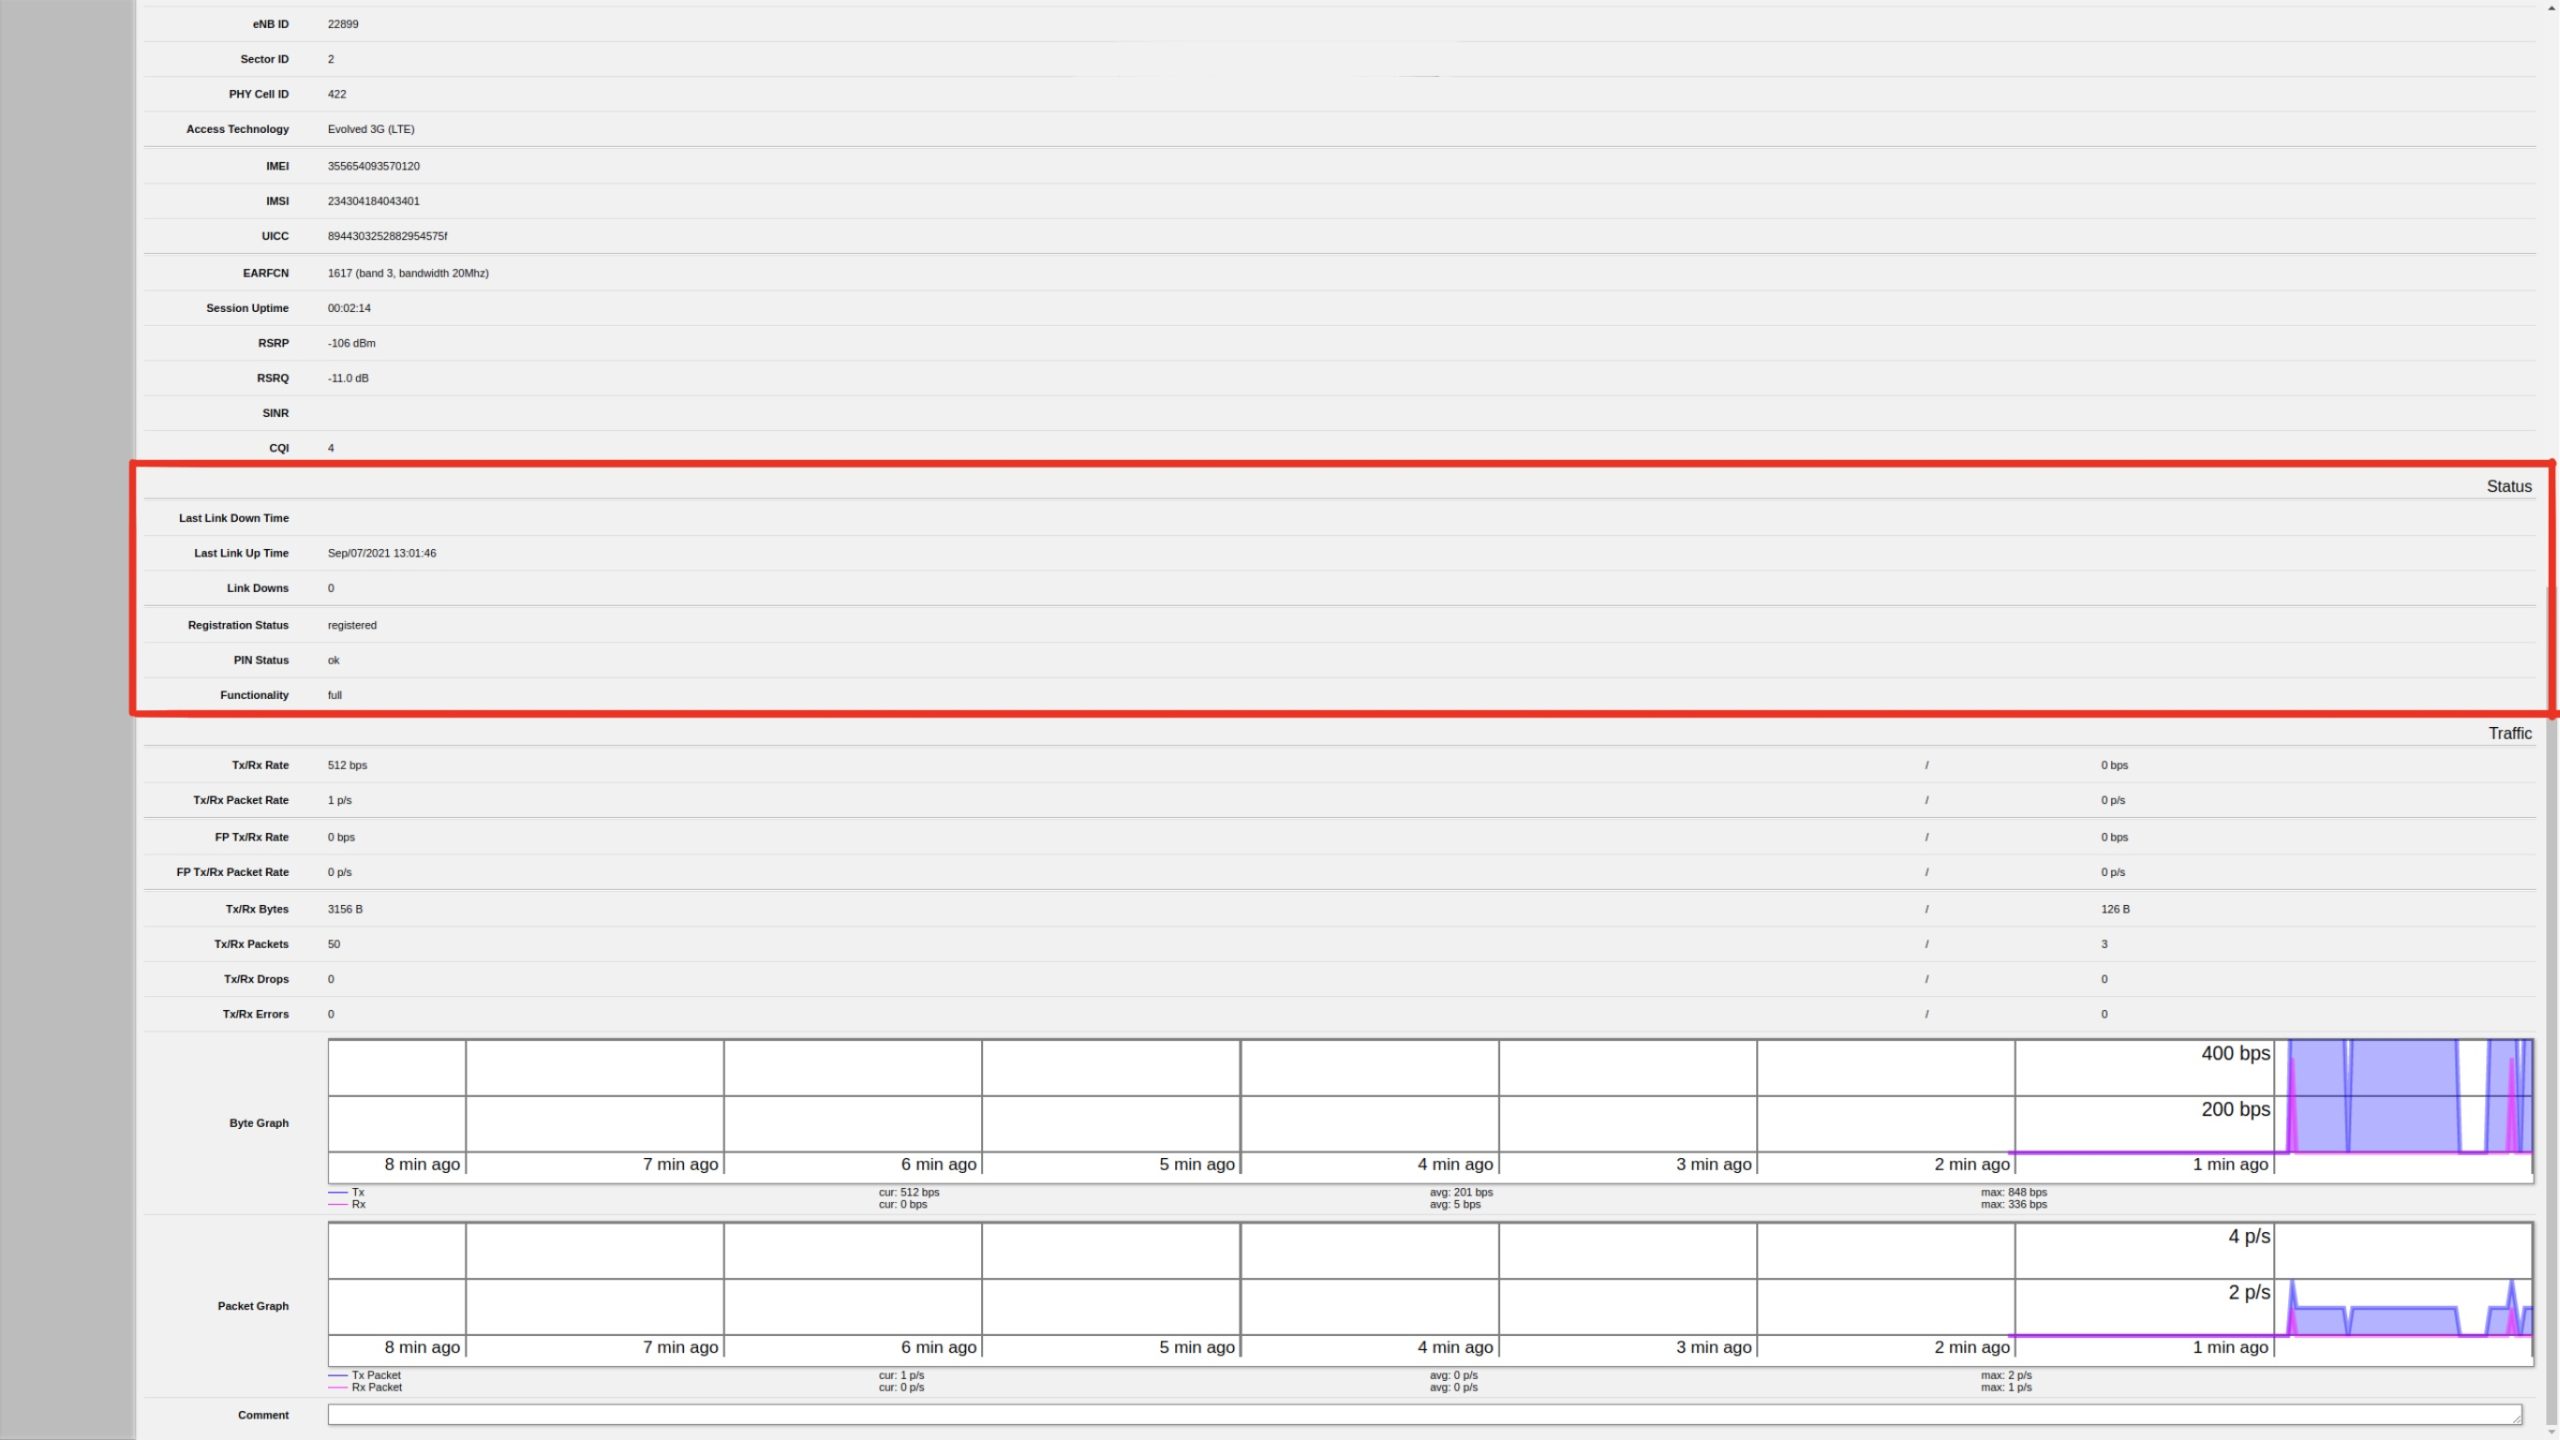
Registration Status: registered
PIN Status: ok
Functionality: full
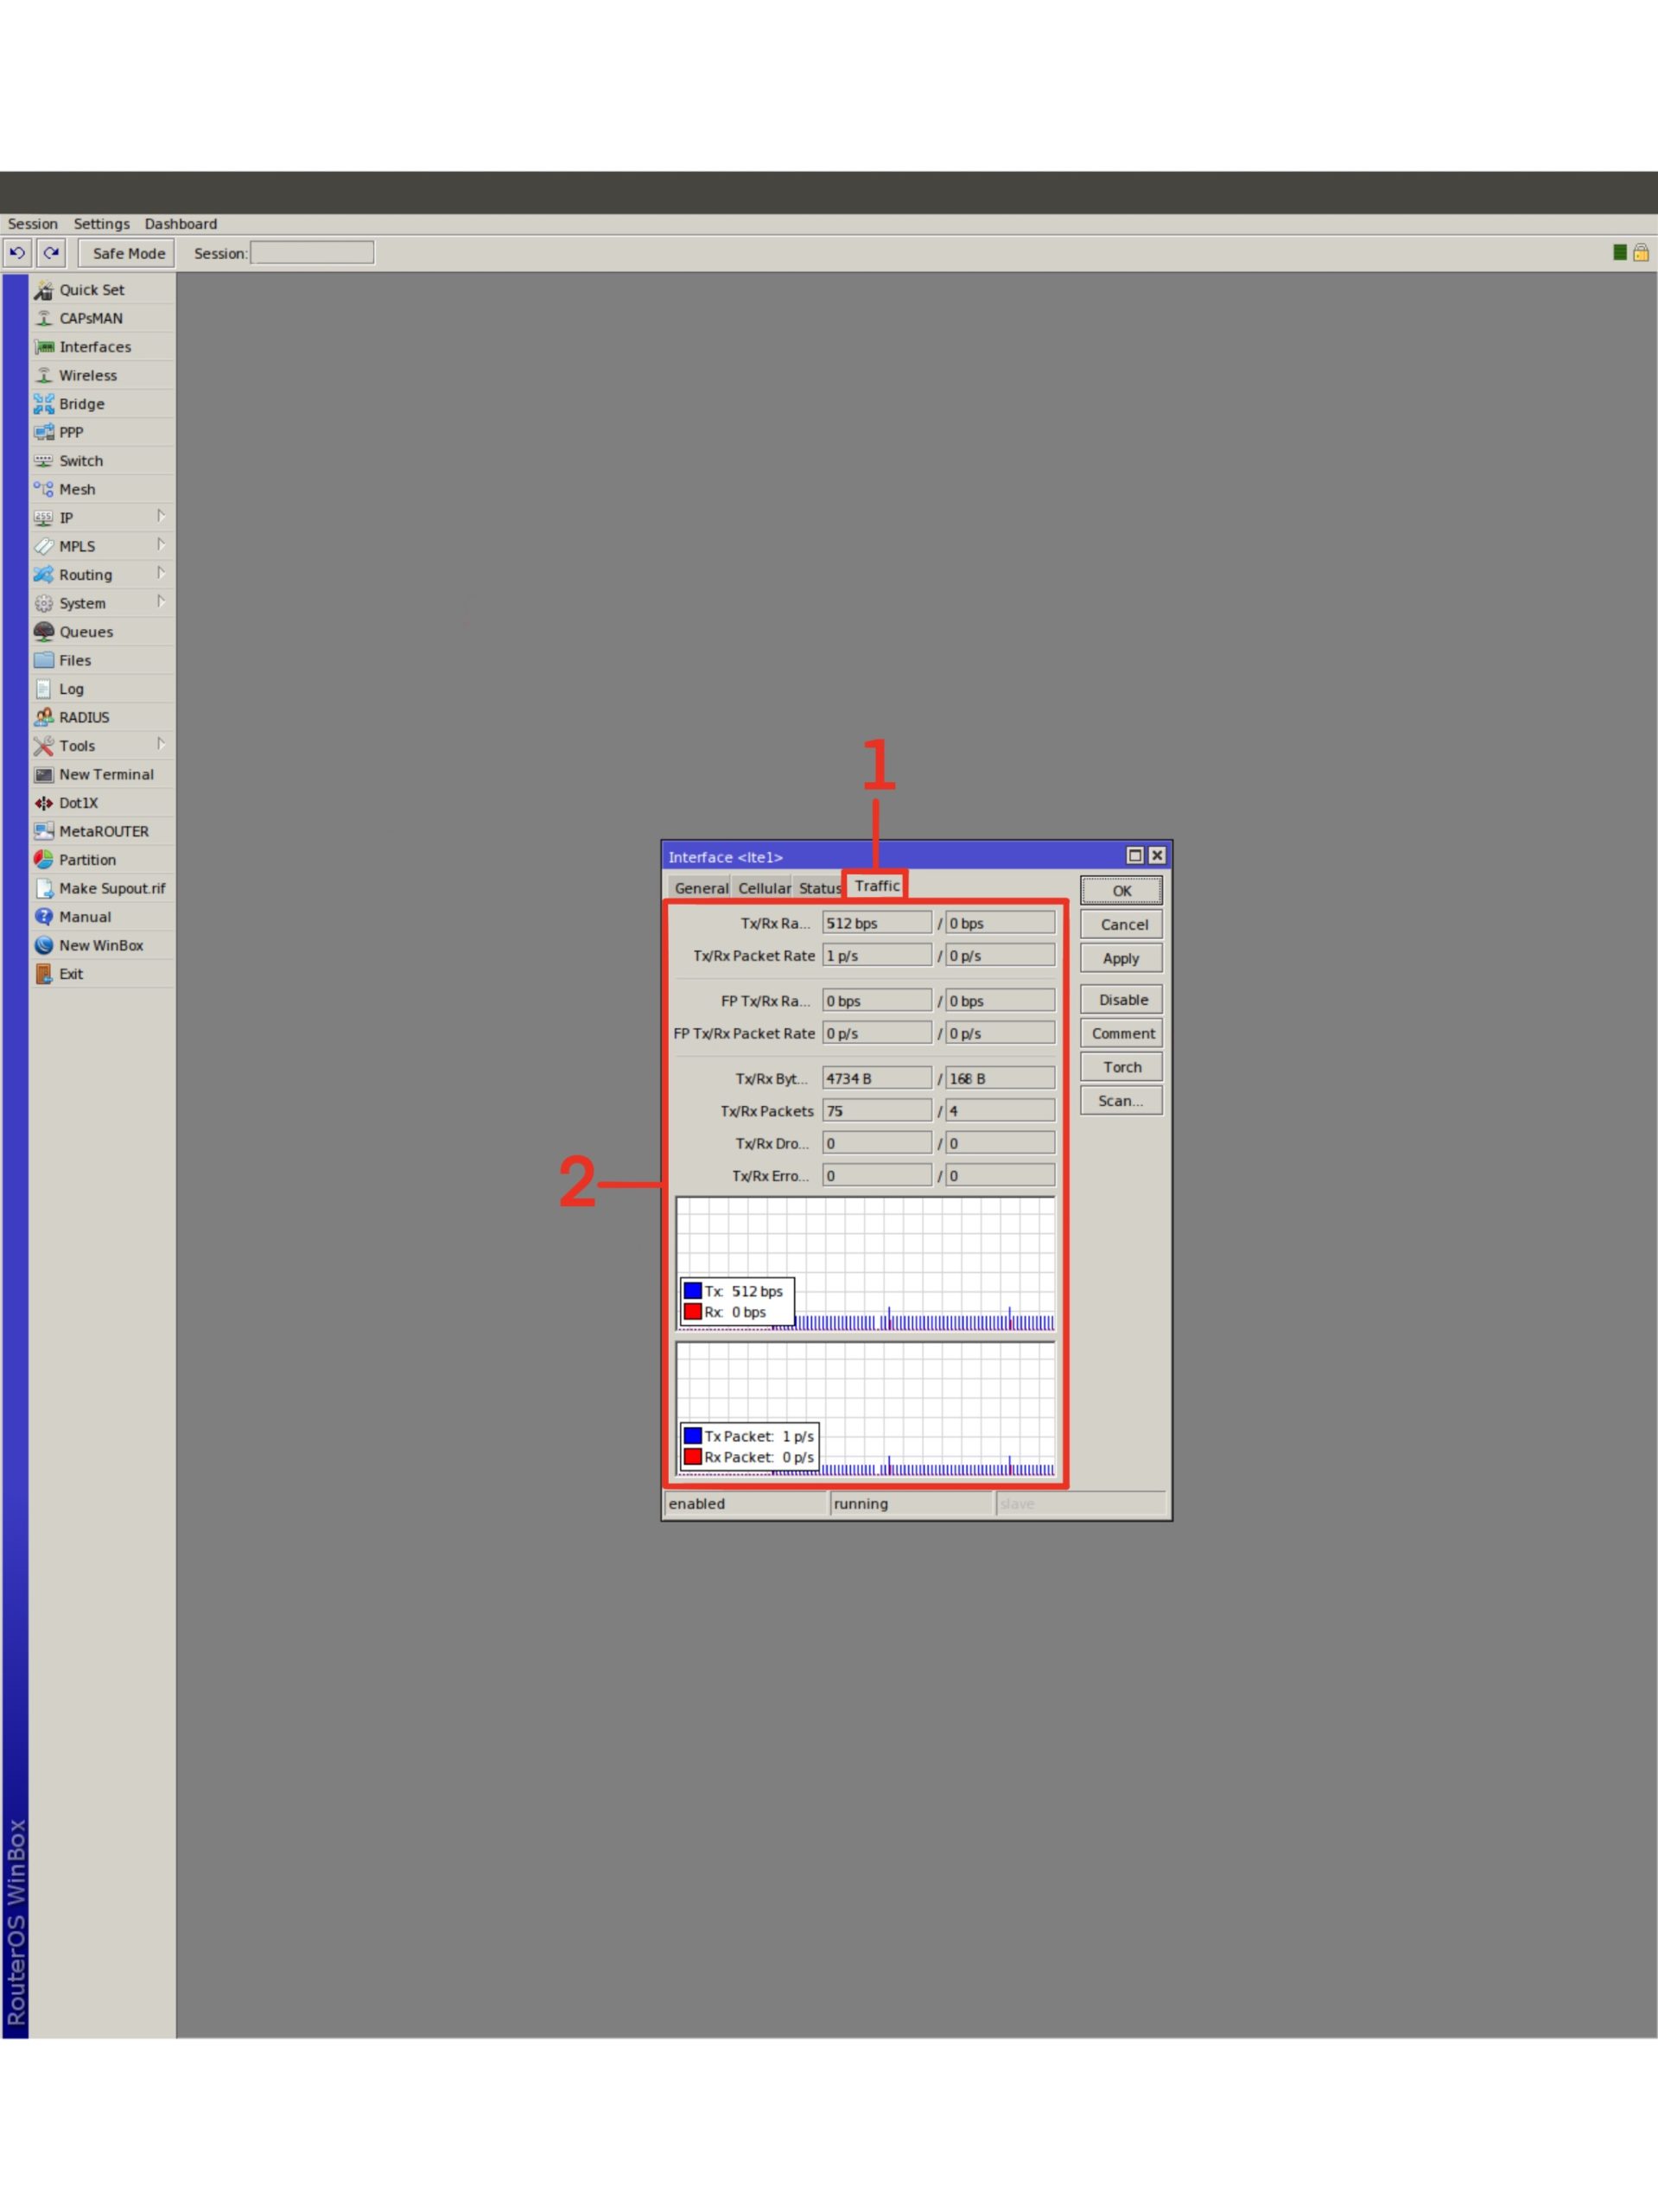
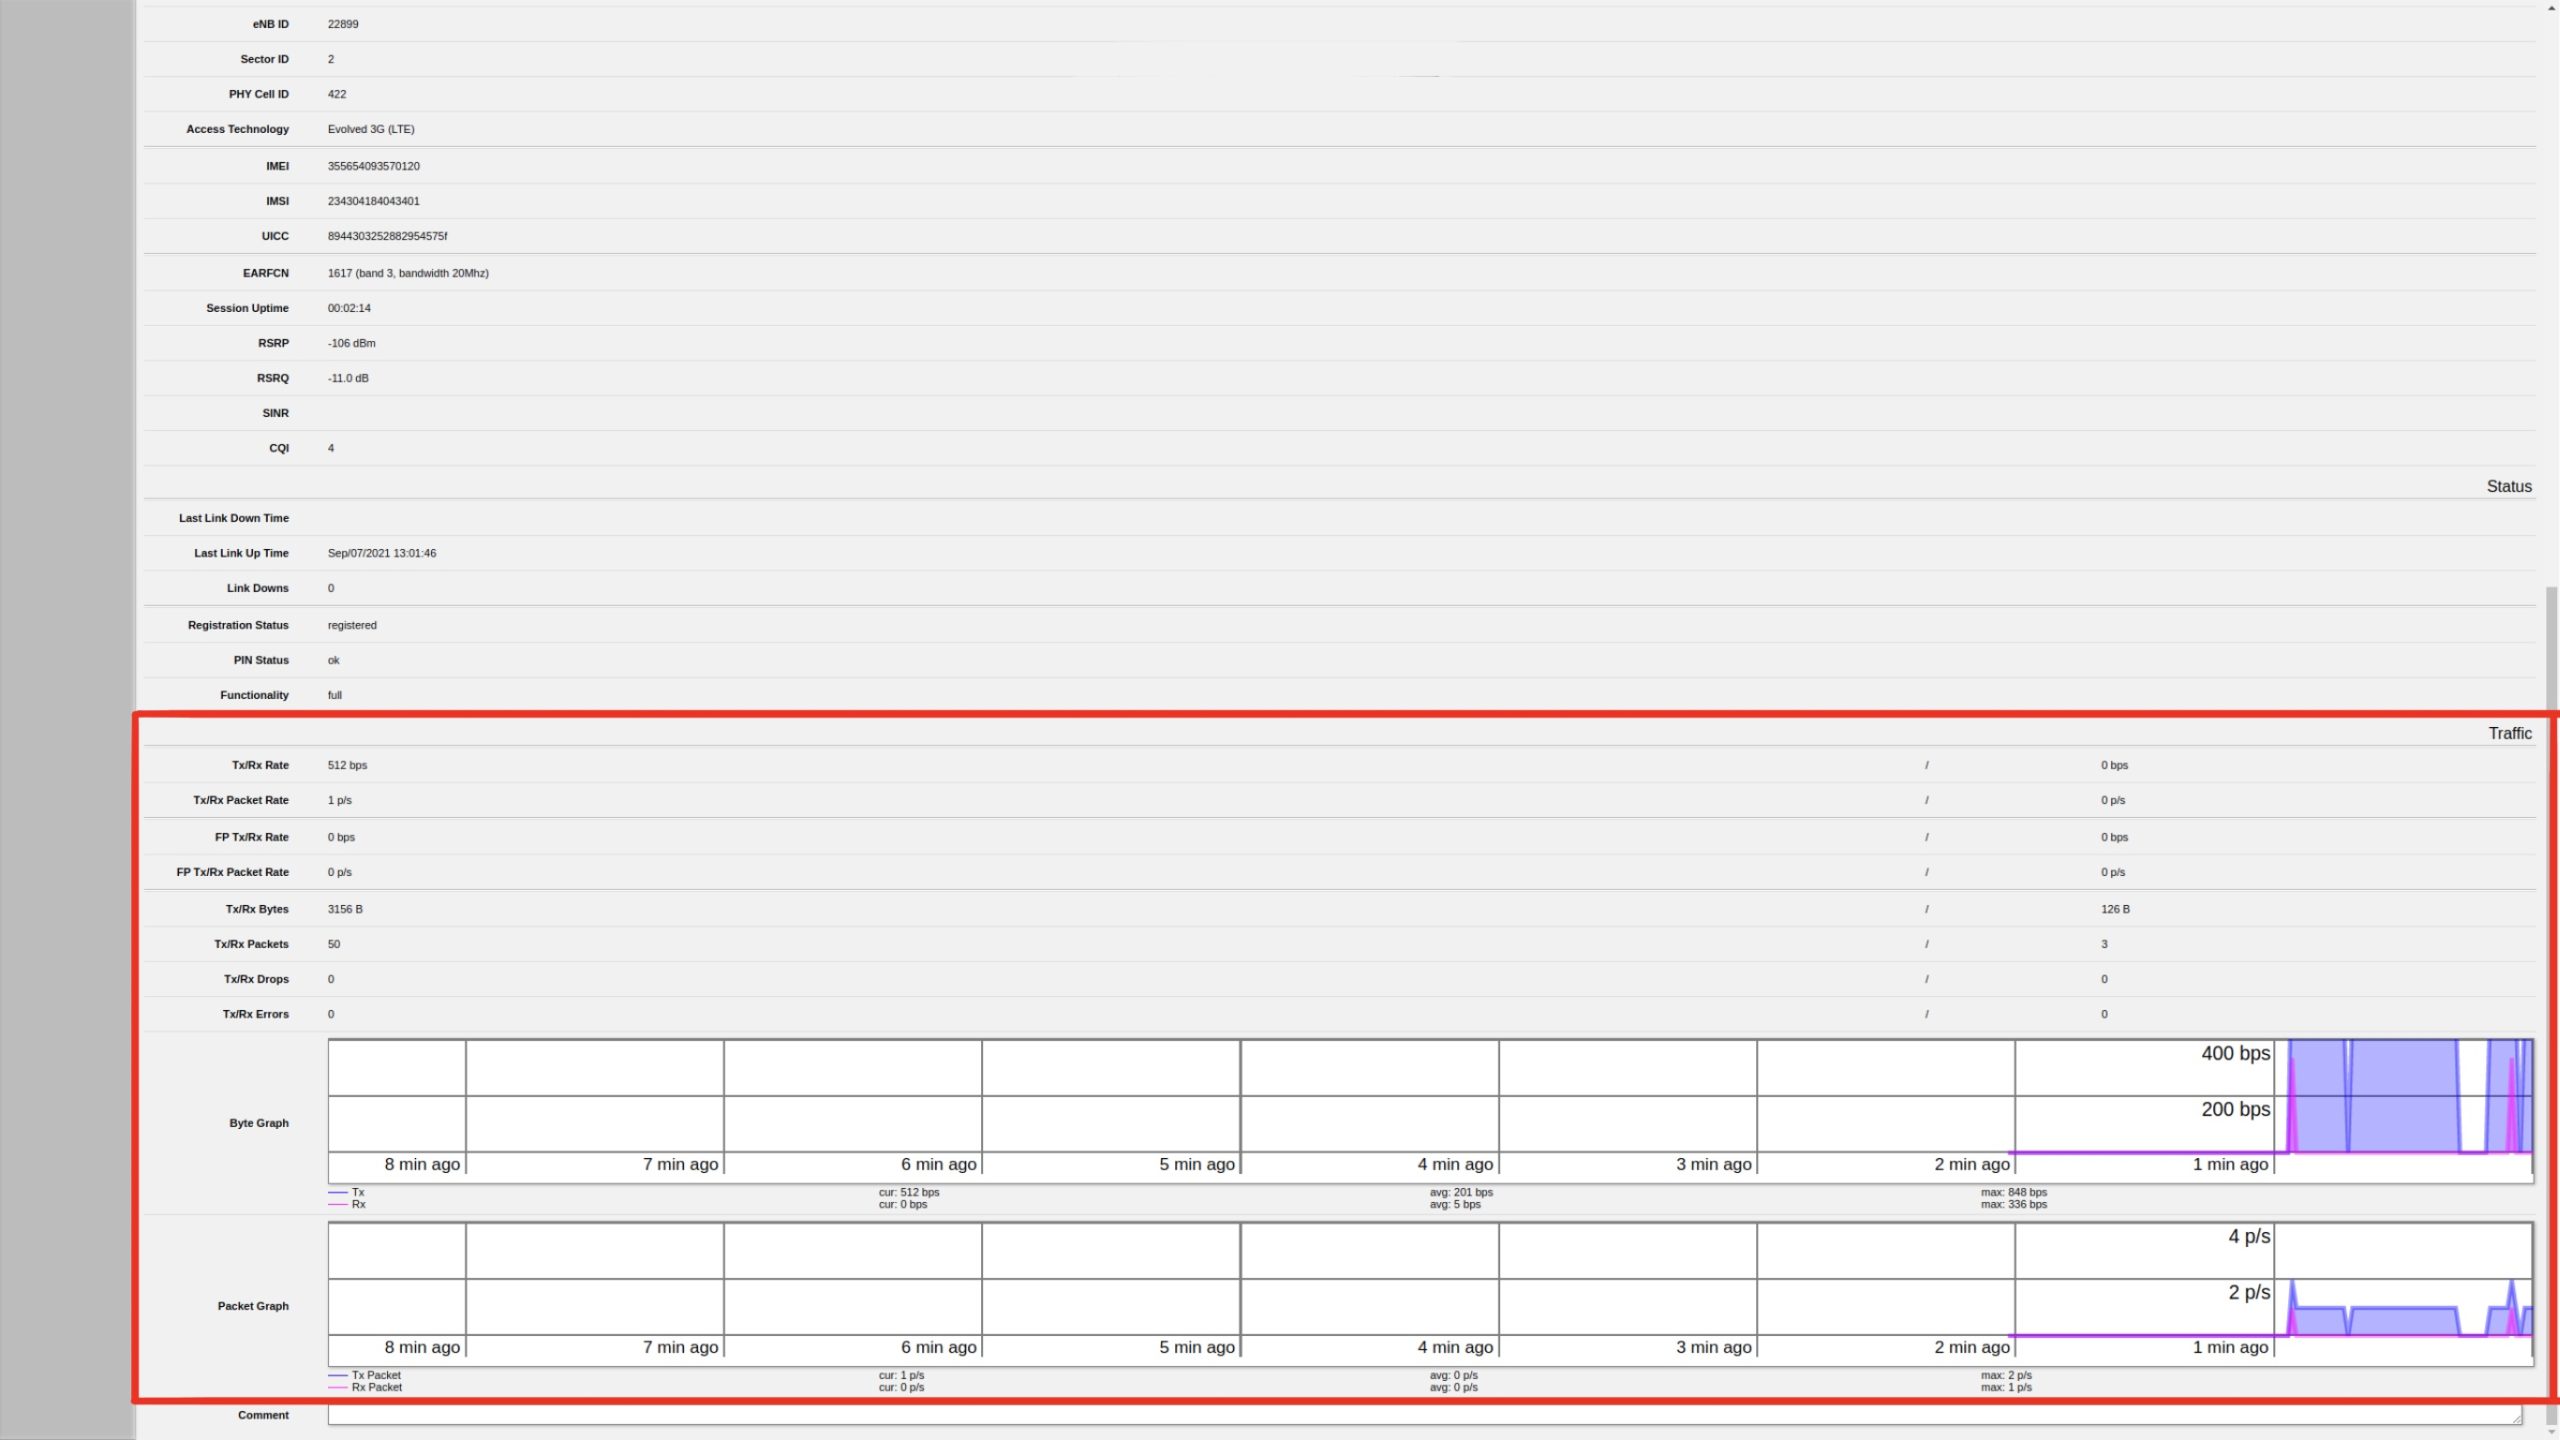
You can then go across to the Traffic tab (Winbox) or scroll down to the Traffic section (WebFig) to view a graph and numeric readouts of traffic flow through the lte1 interface (Fig. 6/6a).
Once this has all been done, you can exit WinBox/WebFig in the knowledge that your device is now set up and ready for operation.
We hope this guide has been useful, but if you have any further questions on APN settings for MikroTik LTE devices, please call our team of experts on 01449 724255 or email shop@linitx.com for further help and support.