 LinITX Blog Ubiquiti & MikroTik Wireless Networking Experts

![]()
The LinITX embedded controller has proven popular since its launch with many units sold. All feedback has been taken on board and alterations have been made to the embedded OS and configuration to make the controller as easy to use as possible. All new controllers purchased in 2015 will include Webmin as standard which will provide a web Gui interface to the OS settings. The controller now includes automatic tasks, the most important of which automatically reboots the controller daily at midnight which frees up resources and reduces problems with Java.
One question we have received is “How do I update the Controller” and more importantly “How do I update the UniFi Software installed”. The Ubiquiti UniFi/Mfi software do not currently update automatically when installed on Windows and OSX and the LinITX Controller is no exception. Lucky enough updating cannot be easier and we shall run through the steps using SSH and the new built in Webmin Gui. For reference a controller with v3 Unifi software will only update to the latest v3 and the same applies for v4.
Updating via SSH or the Serial interface (Default and best upgrade route on all controllers sold)
By default, all controllers have SSH enabled and the command line is also accessible via the serial interface. Apple Mac and Linux users will have serial and SSH capability built in but Windows users will require a SSH or Serial client to interface, we recommend Putty which is freely available here.
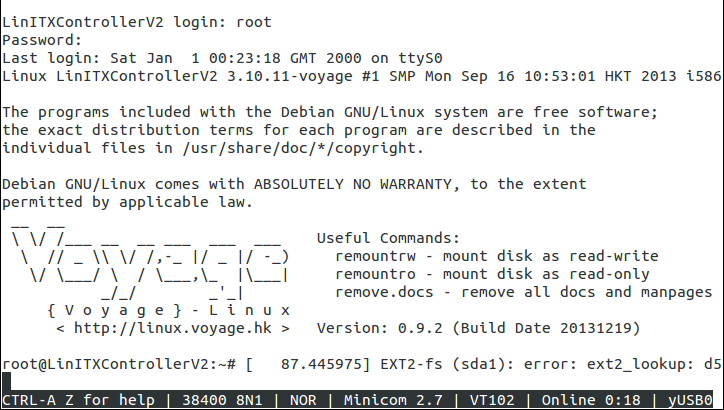
To connect to the controller via serial ensure the RS232 cable is plugged in and connected to your computer, the baud rate will need to be set to 115200. Once the baud rate is set within the serial terminal interface or Putty you will see a login prompt or if you have just started the controller you will be able to see its start up checks in real time. When prompted for the controller login enter the user name and password. Default Username – root Default Password – ubnt

When you have logged in you will be presented with the Voyage logo and current version number.
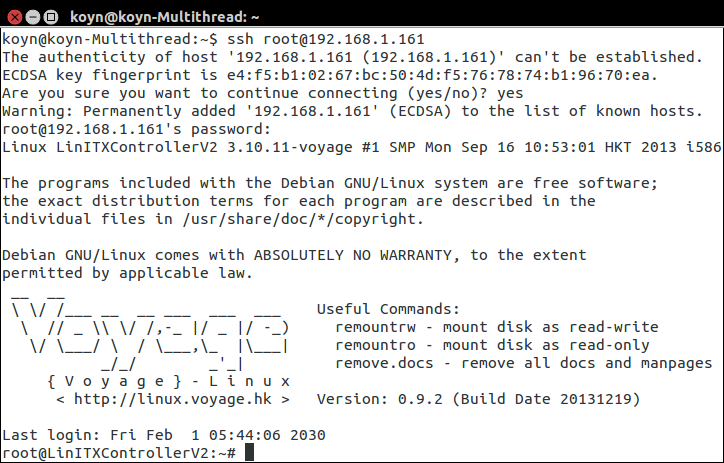
To connect to the controller via an SSH terminal or Putty in Windows you first need to know the IP address your controller is on, this can be found from your main DHCP server or router. The command to SSH to the controller is ssh root@IPADDRESS . If asked to continue before connecting, type yes, you will be then prompted for the password. Once logged in you will be presented with the Voyage logo and version number.
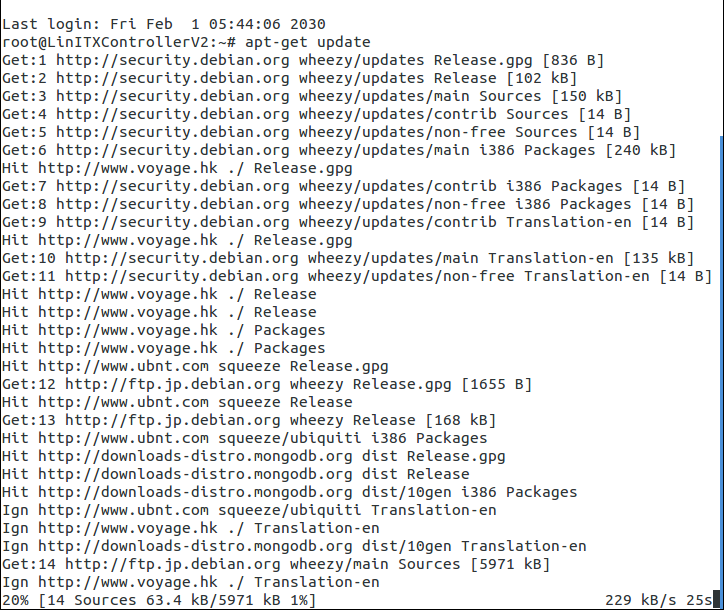
Once logged in via the serial or SSH method you can update the controller’s software and the UniFi Controller software if available. Firstly we need to search for available updates this can be done by using the ‘apt-get update’ command, this may take a few moments and you will see the controller searching its online repository’s. This can take a few minutes – please be patient.
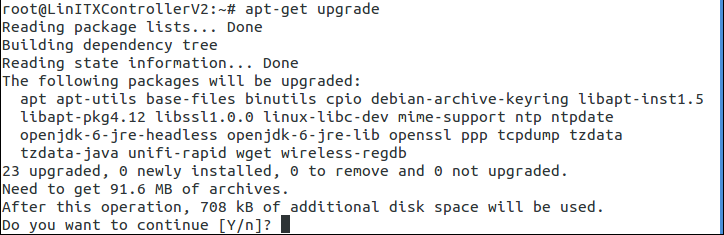
 Now we have the latest list of software packages we can tell the controller to update any out of date software. This can be done using the ‘apt-get upgrade’ command, this function will search the list we just created and let you know what needs updating, if you are happy with the list press y and the board will start updating, again this may take some time.
Once complete it is best to reboot the controller, you can do this by issuing the ‘reboot’ command. During reboot any SSH connection will be lost but serial connections will remain. Once the controller reboots all services will resume as normal with updates applied.
Updating via Webmin
If you prefer to use a GUI interface you can use the new built in Webmin portal (2015+ Models only). Webmin can be accessed via the IP of the controller followed by port 10000, your link should look like <https://controllerIP:10000>. You will be presented with a login page, use the controllers login. Default Username – root Default Password – ubnt. Once logged in you will be presented with the Webmin welcome screen which includes all the basic details about the controller and its current resource status.
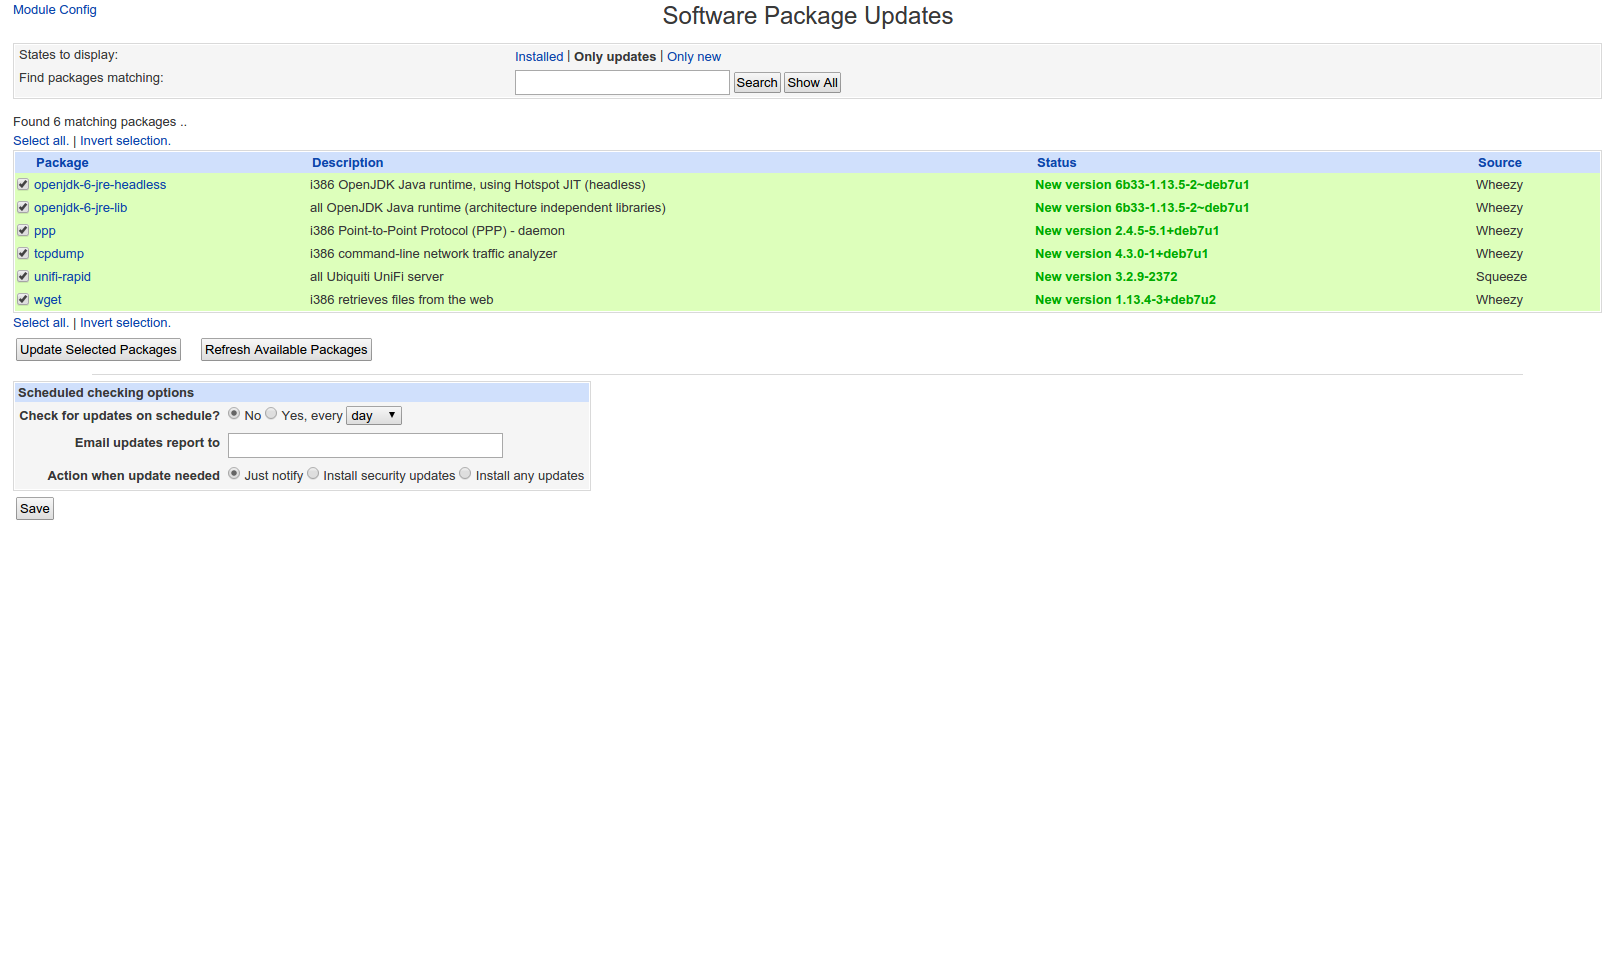
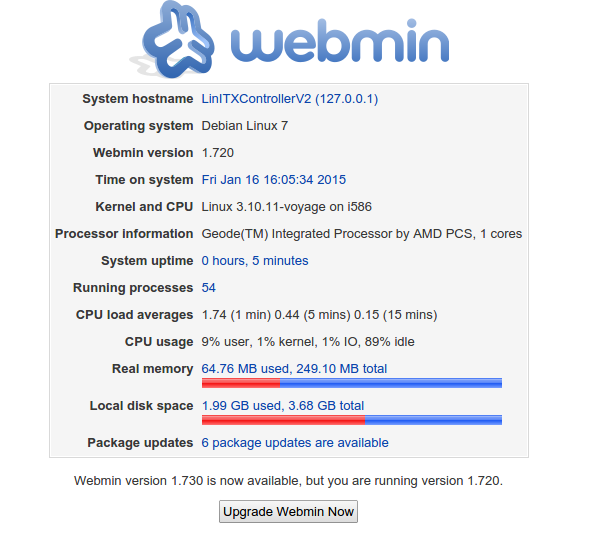 This welcome page will also let you know if updates are available for the controller and the Webmin console itself. If you are presented with the ‘Upgrade Webmin Now’ button you can press it and upgrade Webmin but please be patient as Webmin will stop working during the upgrade and can take up to 10 mins to come back online. If software updates are available you will be able to click the link to the right of ‘Package updates’, you will be taken to the ‘Software Package Updates’ page. Tick the updates you wish to install then click the ‘Update Selected Packages’ button followed by install now. The process is now automatic and will take a few minutes to complete, Webmin may stop responding during the process – please be patient.
The controller will now be up to date and ready to carry on as normal. You should check in at least once a week for updates, Ubiquiti software updates will be available as soon as Ubiquiti release them to the public domain.
As of 2017 Ubiquiti changed the Unifi Controller source location. The following steps may have to be taken to ensure your controller can update.
1. Use the following command to add a new source list:
echo 'deb http://www.ubnt.com/downloads/unifi/debian stable ubiquiti' | sudo tee /etc/apt/sources.list.d/100-ubnt-unifi.list
 |
NOTE: Using http://www.ubnt.com/downloads/unifi/debian on a browser will result in a 403 Forbidden page. This is because we do not allow direct listing/access to this link. The URL is only meant to be used when using the CLI commands as in the one shown above.
|
2. Add the GPG Keys. To add the GPG Keys use one of the two methods described below, Method A is recommended. When using the commands below, it is assumed you have sudo and wget installed, more information about sudo can be found here, and wget here.
(Method A) Download and install the following trusted key into /etc/apt/trusted.gpg.d
sudo wget -O /etc/apt/trusted.gpg.d/unifi-repo.gpg https://dl.ubnt.com/unifi/unifi-repo.gpg
(Method B) Using apt-key
sudo apt-key adv --keyserver keyserver.ubuntu.com --recv 06E85760C0A52C50
3. Update. Retrieve the latest package information. Note: If this results in an error, please check the User Tip below.
sudo apt-get update
4. Install and upgrade the UniFi controller.
sudo apt-get install unifi
Your UniFi Controller should now be accessible at the computer’s configured local or public IP address.
The above information is also available in the link here – https://help.ubnt.com/hc/en-us/articles/220066768-UniFi-How-to-Install-Update-via-APT-on-Debian-or-Ubuntu


Hi, purchased one of these last week. (newer model to the one pictured)
I can get into the Unifi controller no problem on port 8443.
But when I go to the webadmin page or SSH and enter the username root password ubnt I get log in failed.
I also tried the default voyage password also a no go.
So can you advise what the password is.
Hi,
The default user name is ‘root’ and the default password is ‘ubnt’, the newer pi controller are the same apart the username which is ‘pi’